Welcome to Synchron Stage Reverb! The plug-in enables you to conduct your instruments at the renowned Stage A of Vienna Synchron Stage while keeping an eye on ease of use and intuitive management.
You can use the plug-in (VST2, VST3, AAX, AU) as an insert effect in your DAW channels, and use an instance for each instrument you want to place on your virtual stage. To avoid probably unwelcome side effects, we recommend using only dry signals, as the plug-in is supposed to take care of their space!
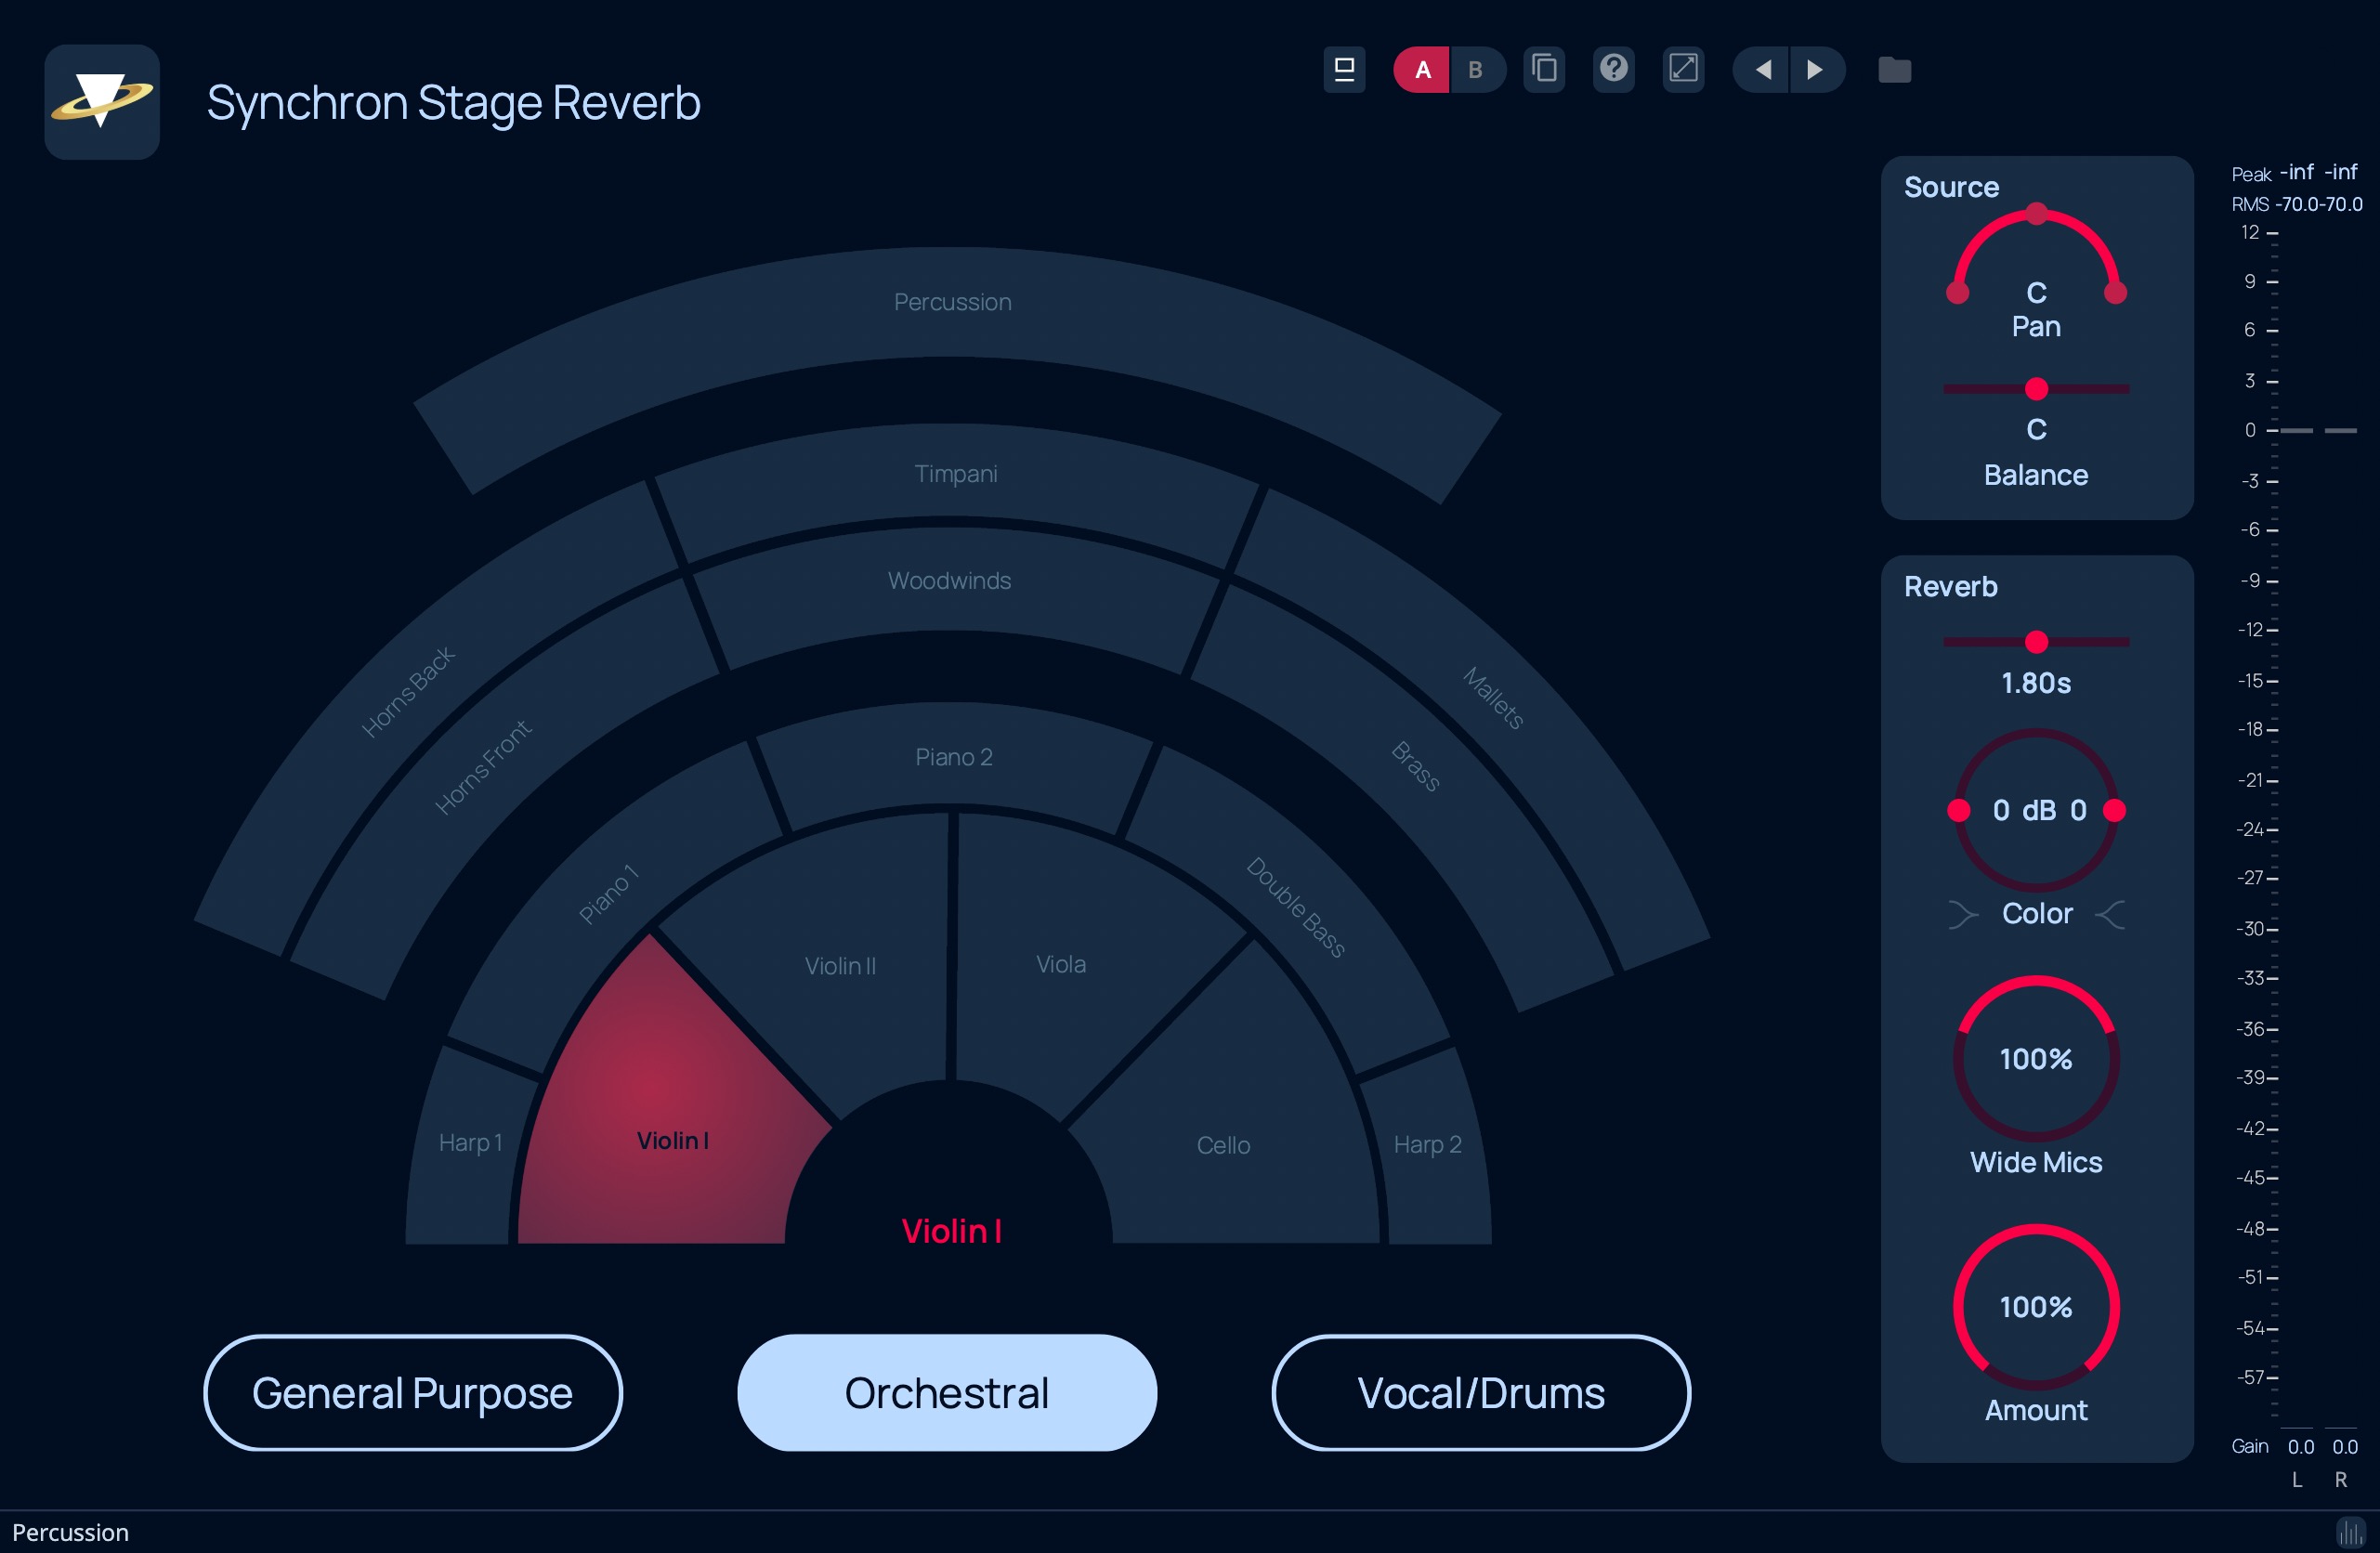
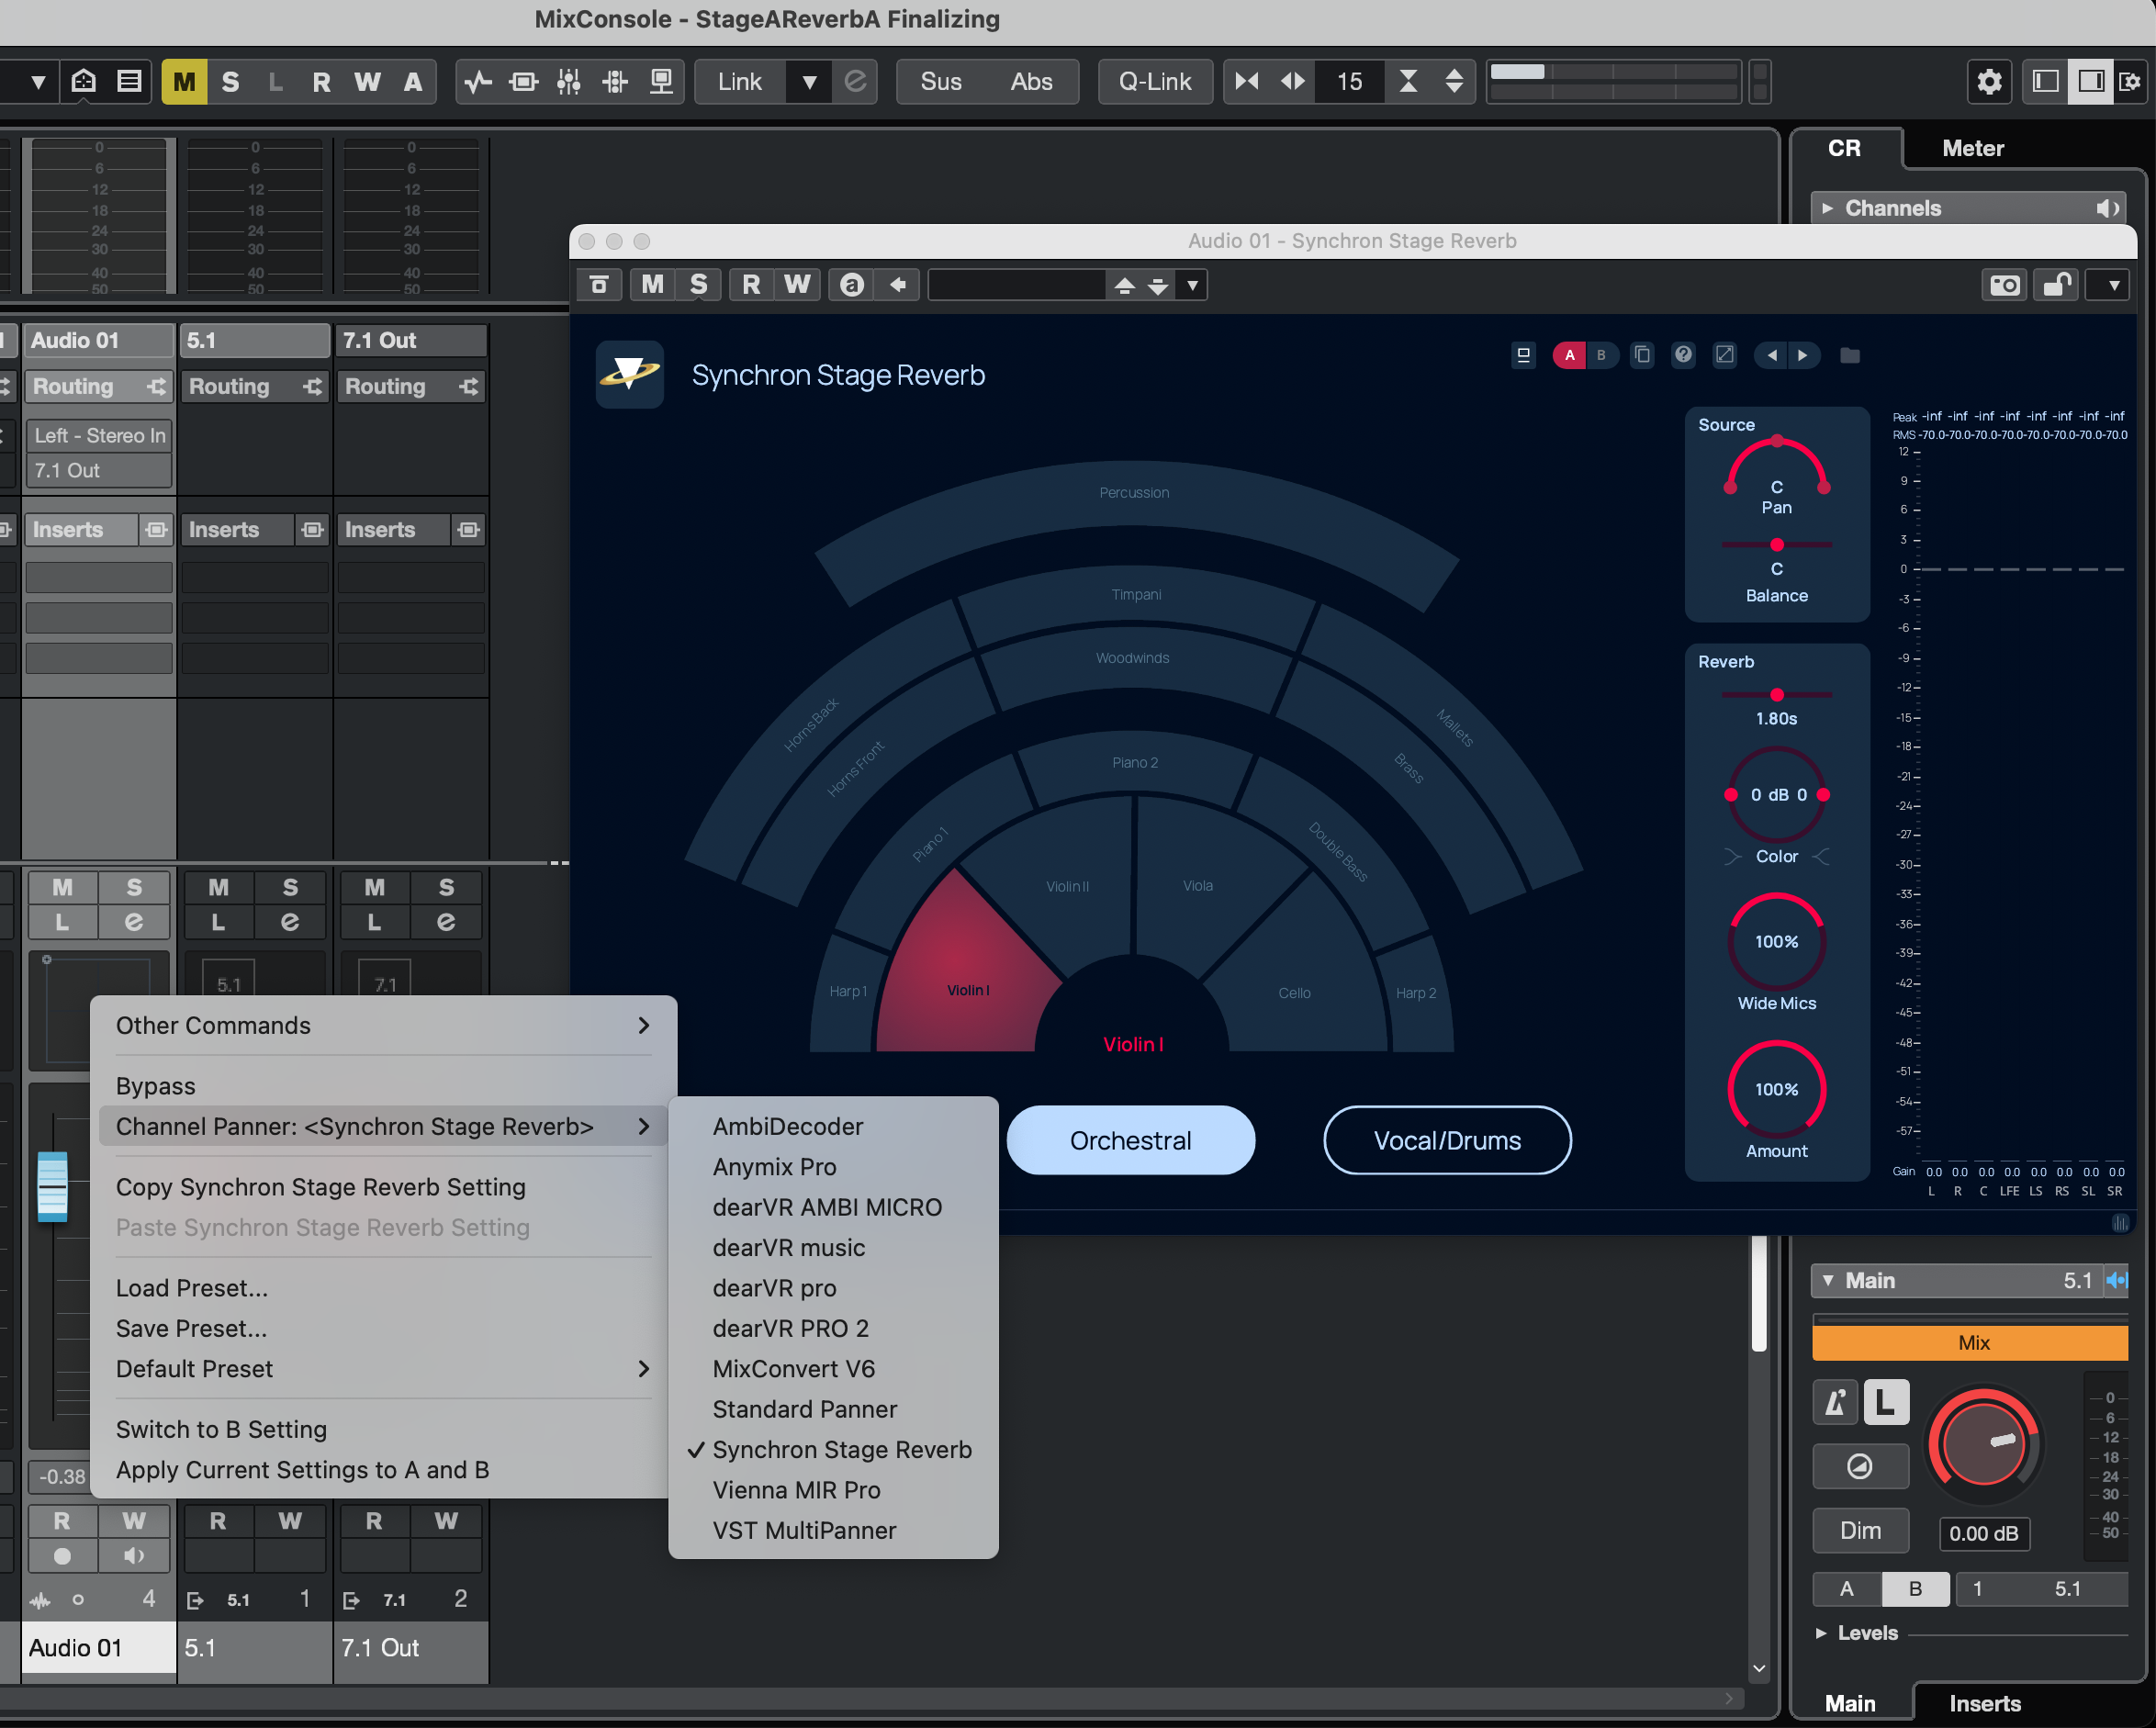
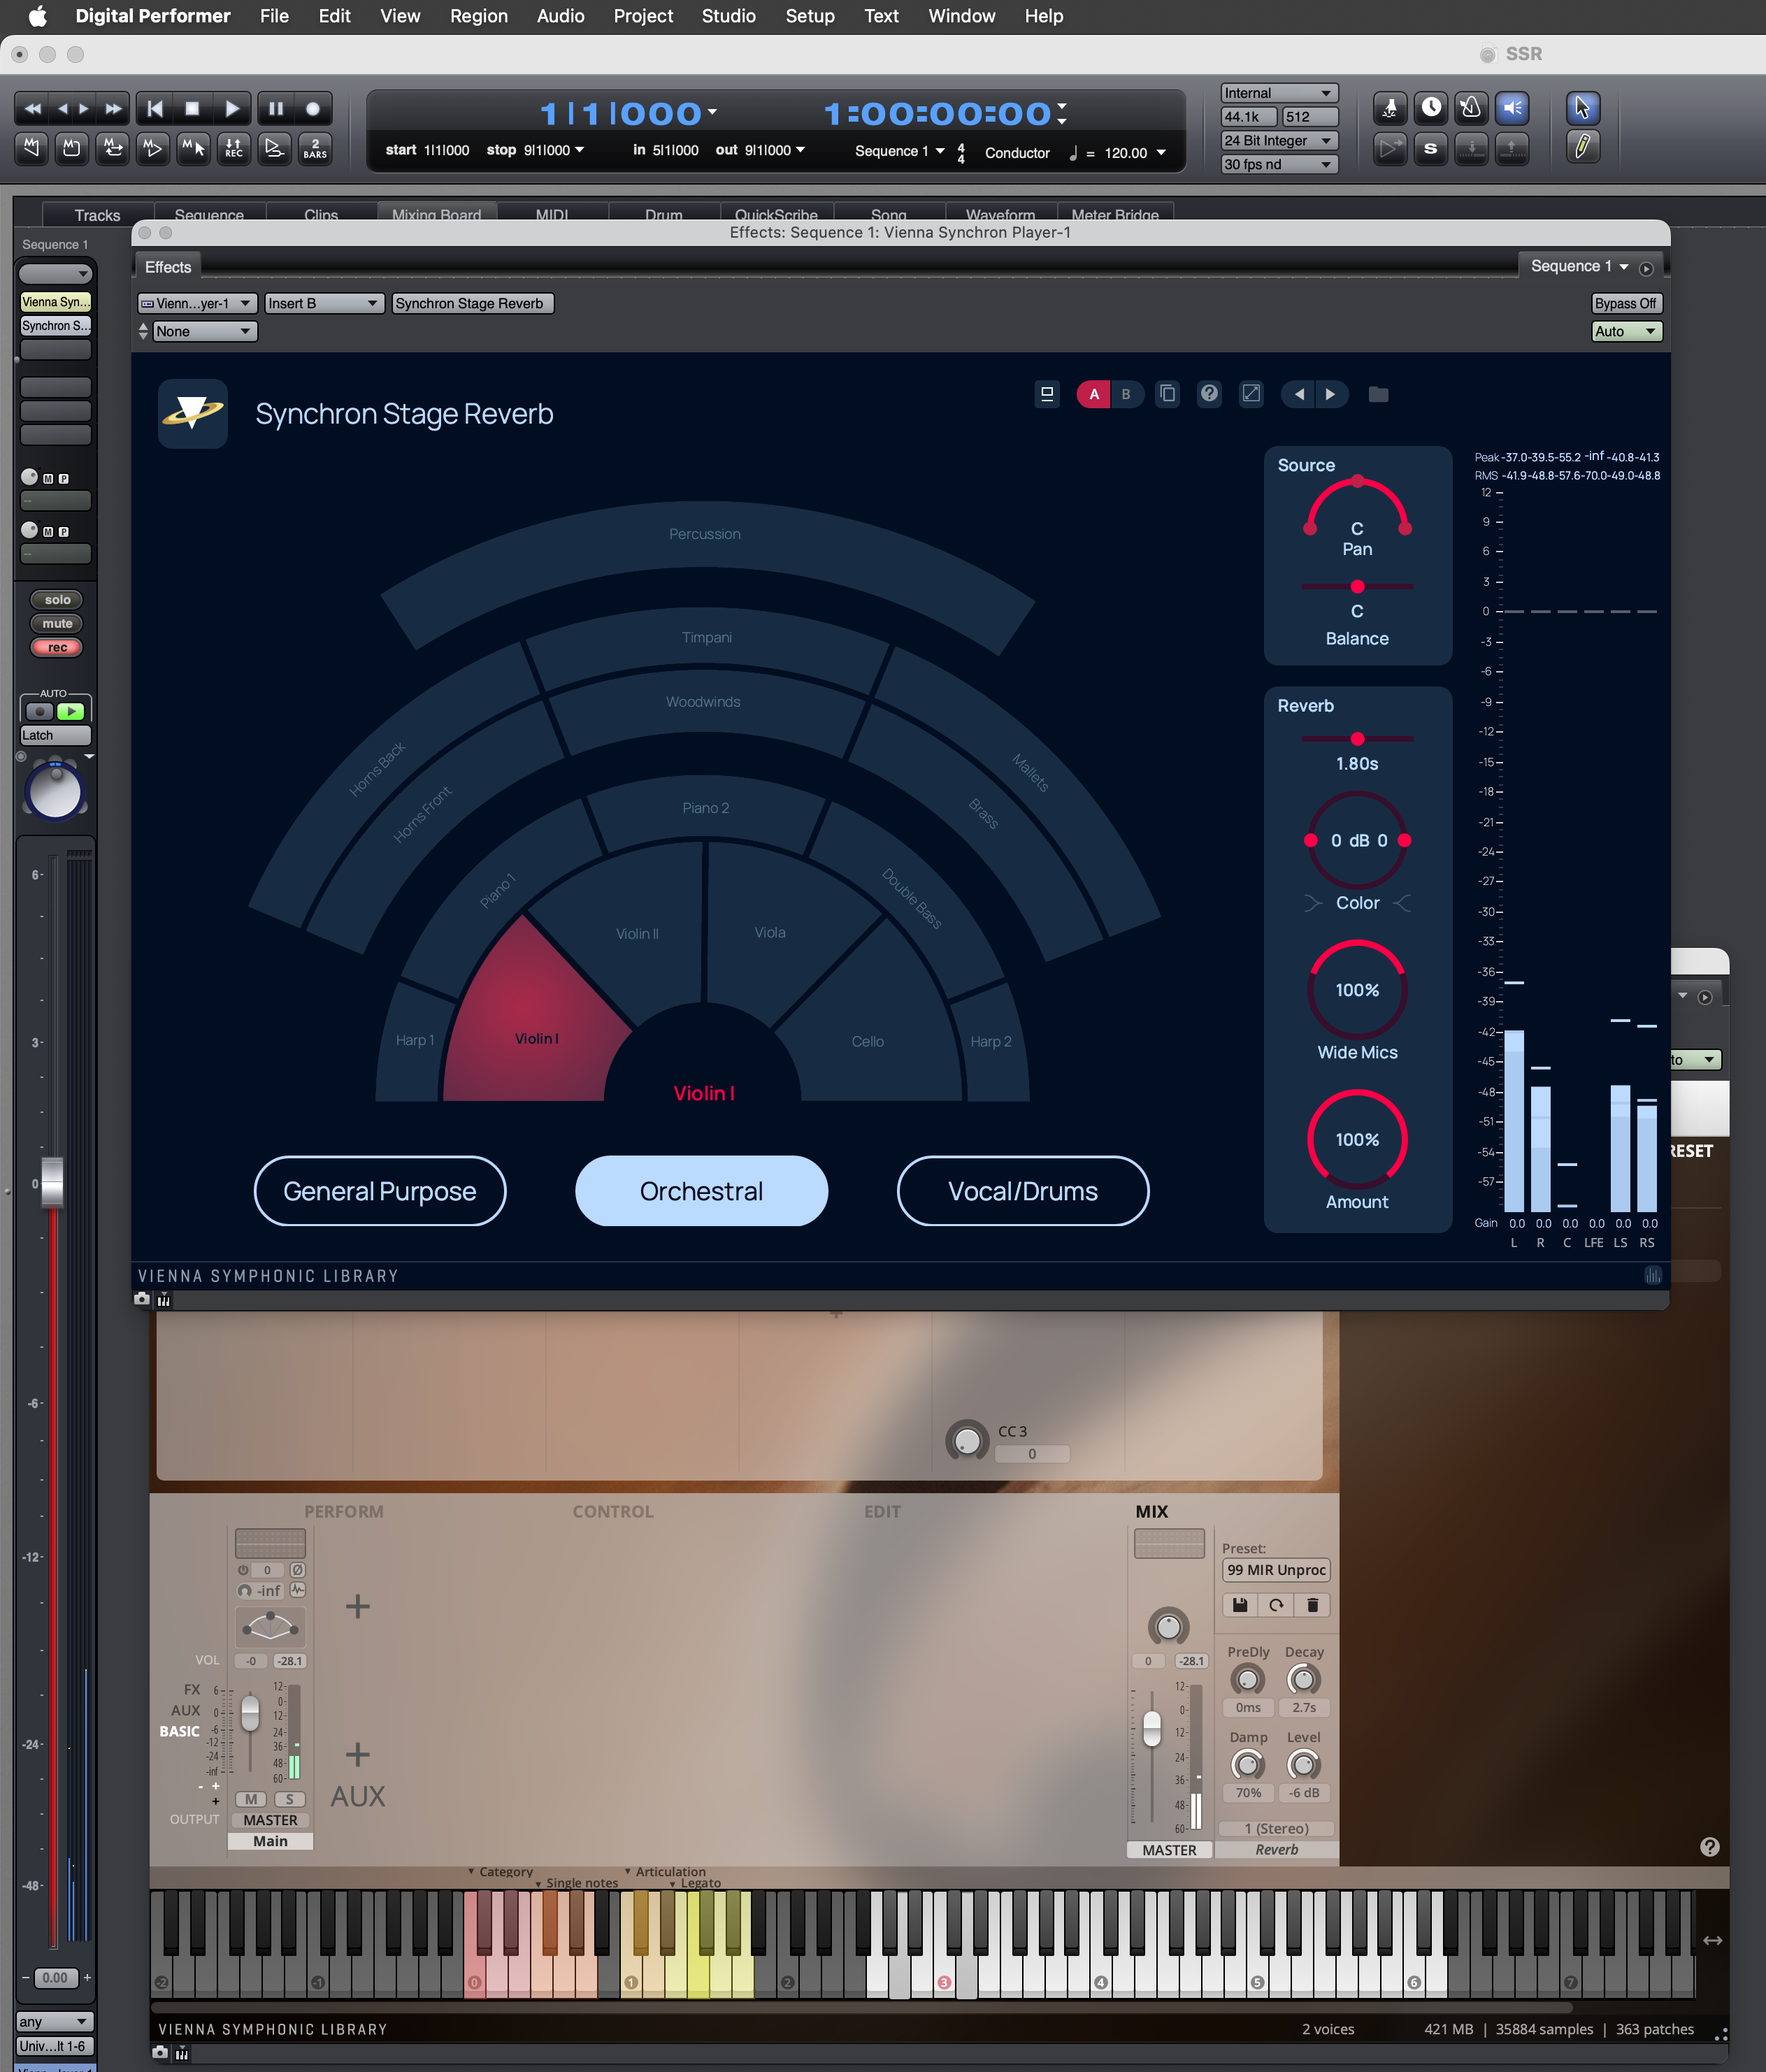
When an instance is first loaded, the GUI shows the Orchestral tab with neutral settings and the first violins section selected as placement and highlighted. There are three presets: General Purpose, Orchestral, and Vocal/Drums, activated by clicking on the respective buttons. You will find more details about the presets below. First, though, about the general controls available. You can adjust the GUI’s display size by clicking on the icon indicated by the magenta frame in the screenshot below.
The plug-in is programmed to work without glitches or shifting clicks when changing parameter values. You will notice that there are sometimes brief fades during changes until the signal can be processed properly again; also, the red indicator rings of the controls will grow darker during that time.
Our aim was also to minimize loading time, so that you can run projects with lots of channels assigned to separate instances of Synchron Stage Reverb, but won’t have to spend too much time waiting for them to open.

Placement selection
Hovering with the mouse over a section highlights it and displays its name at the bottom of the schematic. Simply select by clicking on the field.
Source
Pan is a simple powerpan control. You should rarely have reason to use it, but it can be helpful if, e. g., the signal of a choir recorded in stereo is too wide and yields unsatisfactory results.
Balance, on the other hand, allows you to adjust your source material’s placement within the selected section. Alternatively, you can click and drag your mouse in the selected field. Changes will naturally be most noticeable with wide fields such as Orchestral’s Percussion or Vocal/Drums’ Large Choir. Balance is also reflected in the field’s color gradient. Cmd/Ctrl-click either the balance fader or the instrument field to reset to zero. Switching to another field also resets balance.
Reverb
Color allows you to adjust timbre with the help of low-shelf (left) and high-shelf (right) filters which can be adjusted in a range from -9 dB to +9 dB.
Wide Mics defines how much of the signal comes from the wide and L/R microphones, and how much from the center, so 0% is only center (amounting to mono), and 200% is maximum width.
Amount sets the relation between dry and wet signal – 0% means dry signal only, 100% is wet signal only. Holding the Alt key while adjusting this parameter will affect all open instances of Synchron Stage Reverb relative to their original value, i. e., if you decrease the wet amount of one instance by 10%, all others will also go down 10%. Naturally, once a boundary is reached, the value cannot be increased or decreased any further. The control turns light blue to indicate when your changes will affect all instances.
All parameters can be reset to their default values by Cmd/Ctrl-clicking on the respective control.
Orchestral
The preset displays the sections of the orchestra. The available sections are:
Violin I, Violin II, Viola, Cello, Double Bass
Harp 1/2, Piano 1/2
Horns front/back, Woodwinds, Brass
Timpani, Mallets, Percussion
Since the reverb impulses are not highly processed, other orchestral arrangements are also possible. For instance, in German Seating the 2nd violins are seated on the right side, and the basses at the center (in the place of Piano 2).
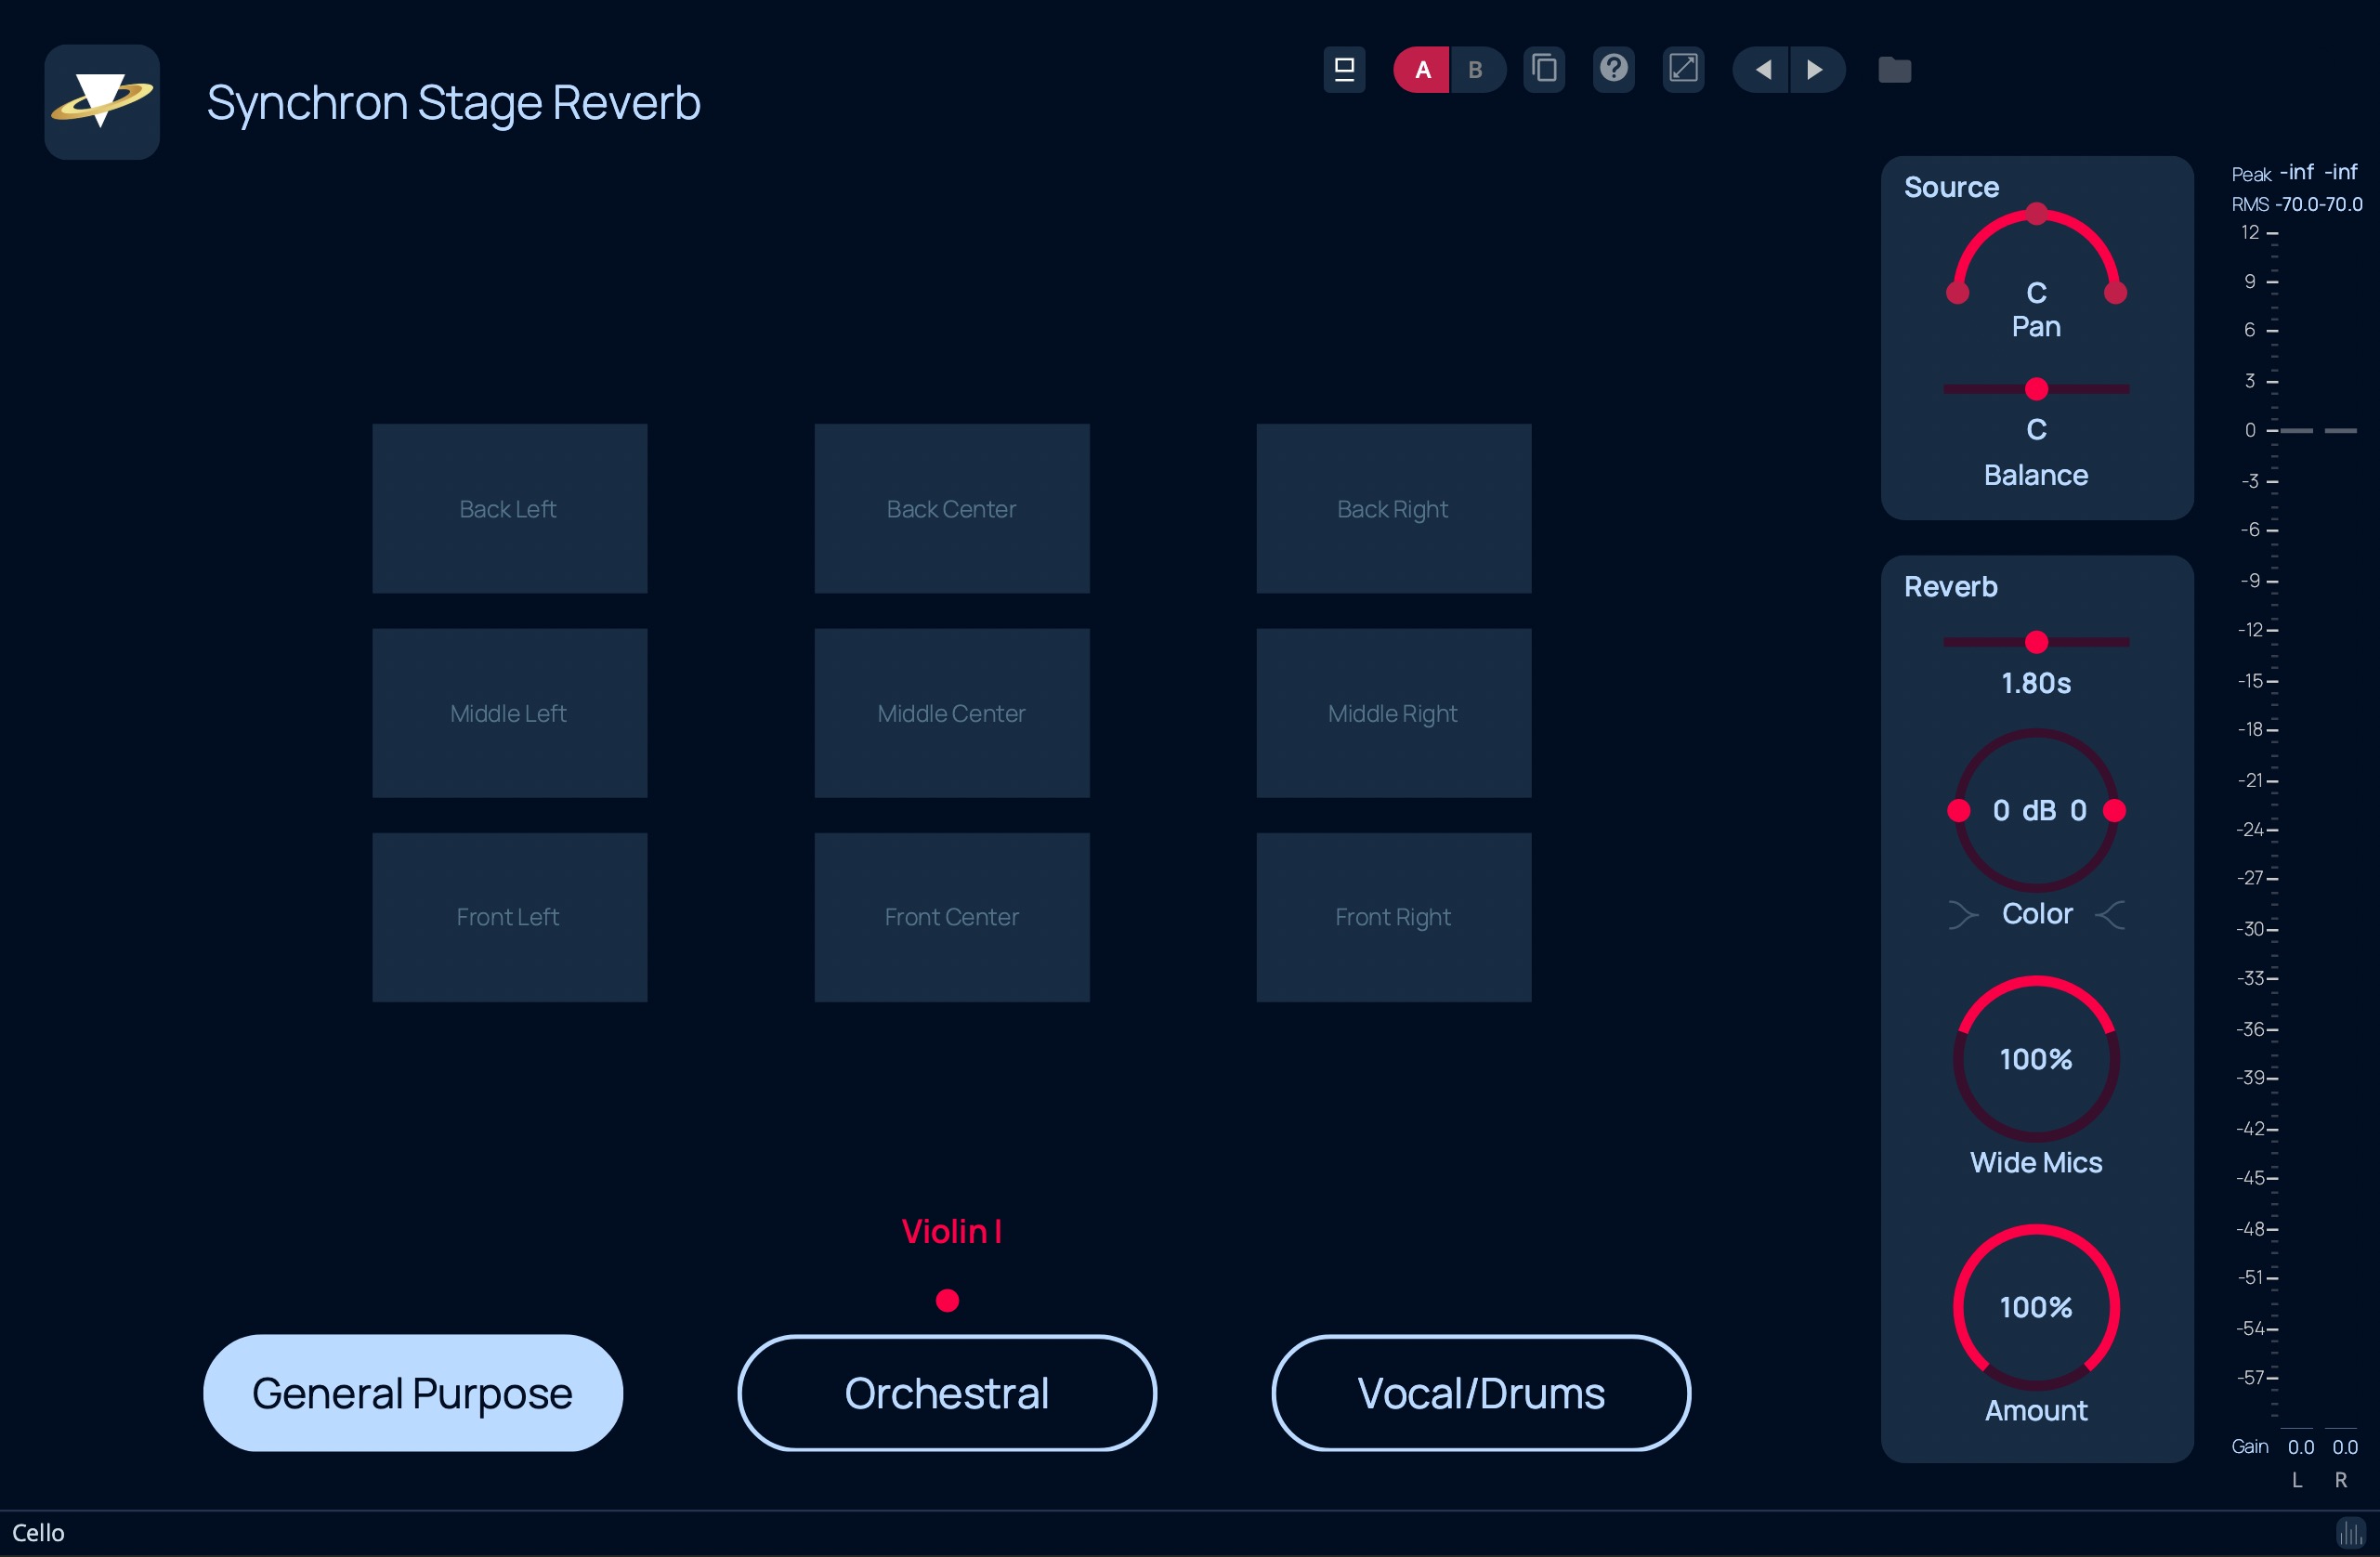
General Purpose
This Preset has a somewhat simpler design. It divides the space into 9 sections: left, center, and right in the front, middle, and back.
The red dot over the “Orchestral” button indicates that a placement is already selected in that preset. It would also display the name of the section, but when the screenshot was made the mouse was hovering over the Back Center field so this name is shown. Similarly, a selection in one of the presets will be indicated in the others by a dot in the color of the current selection over the preset button it belongs to, and its name displayed in the middle.
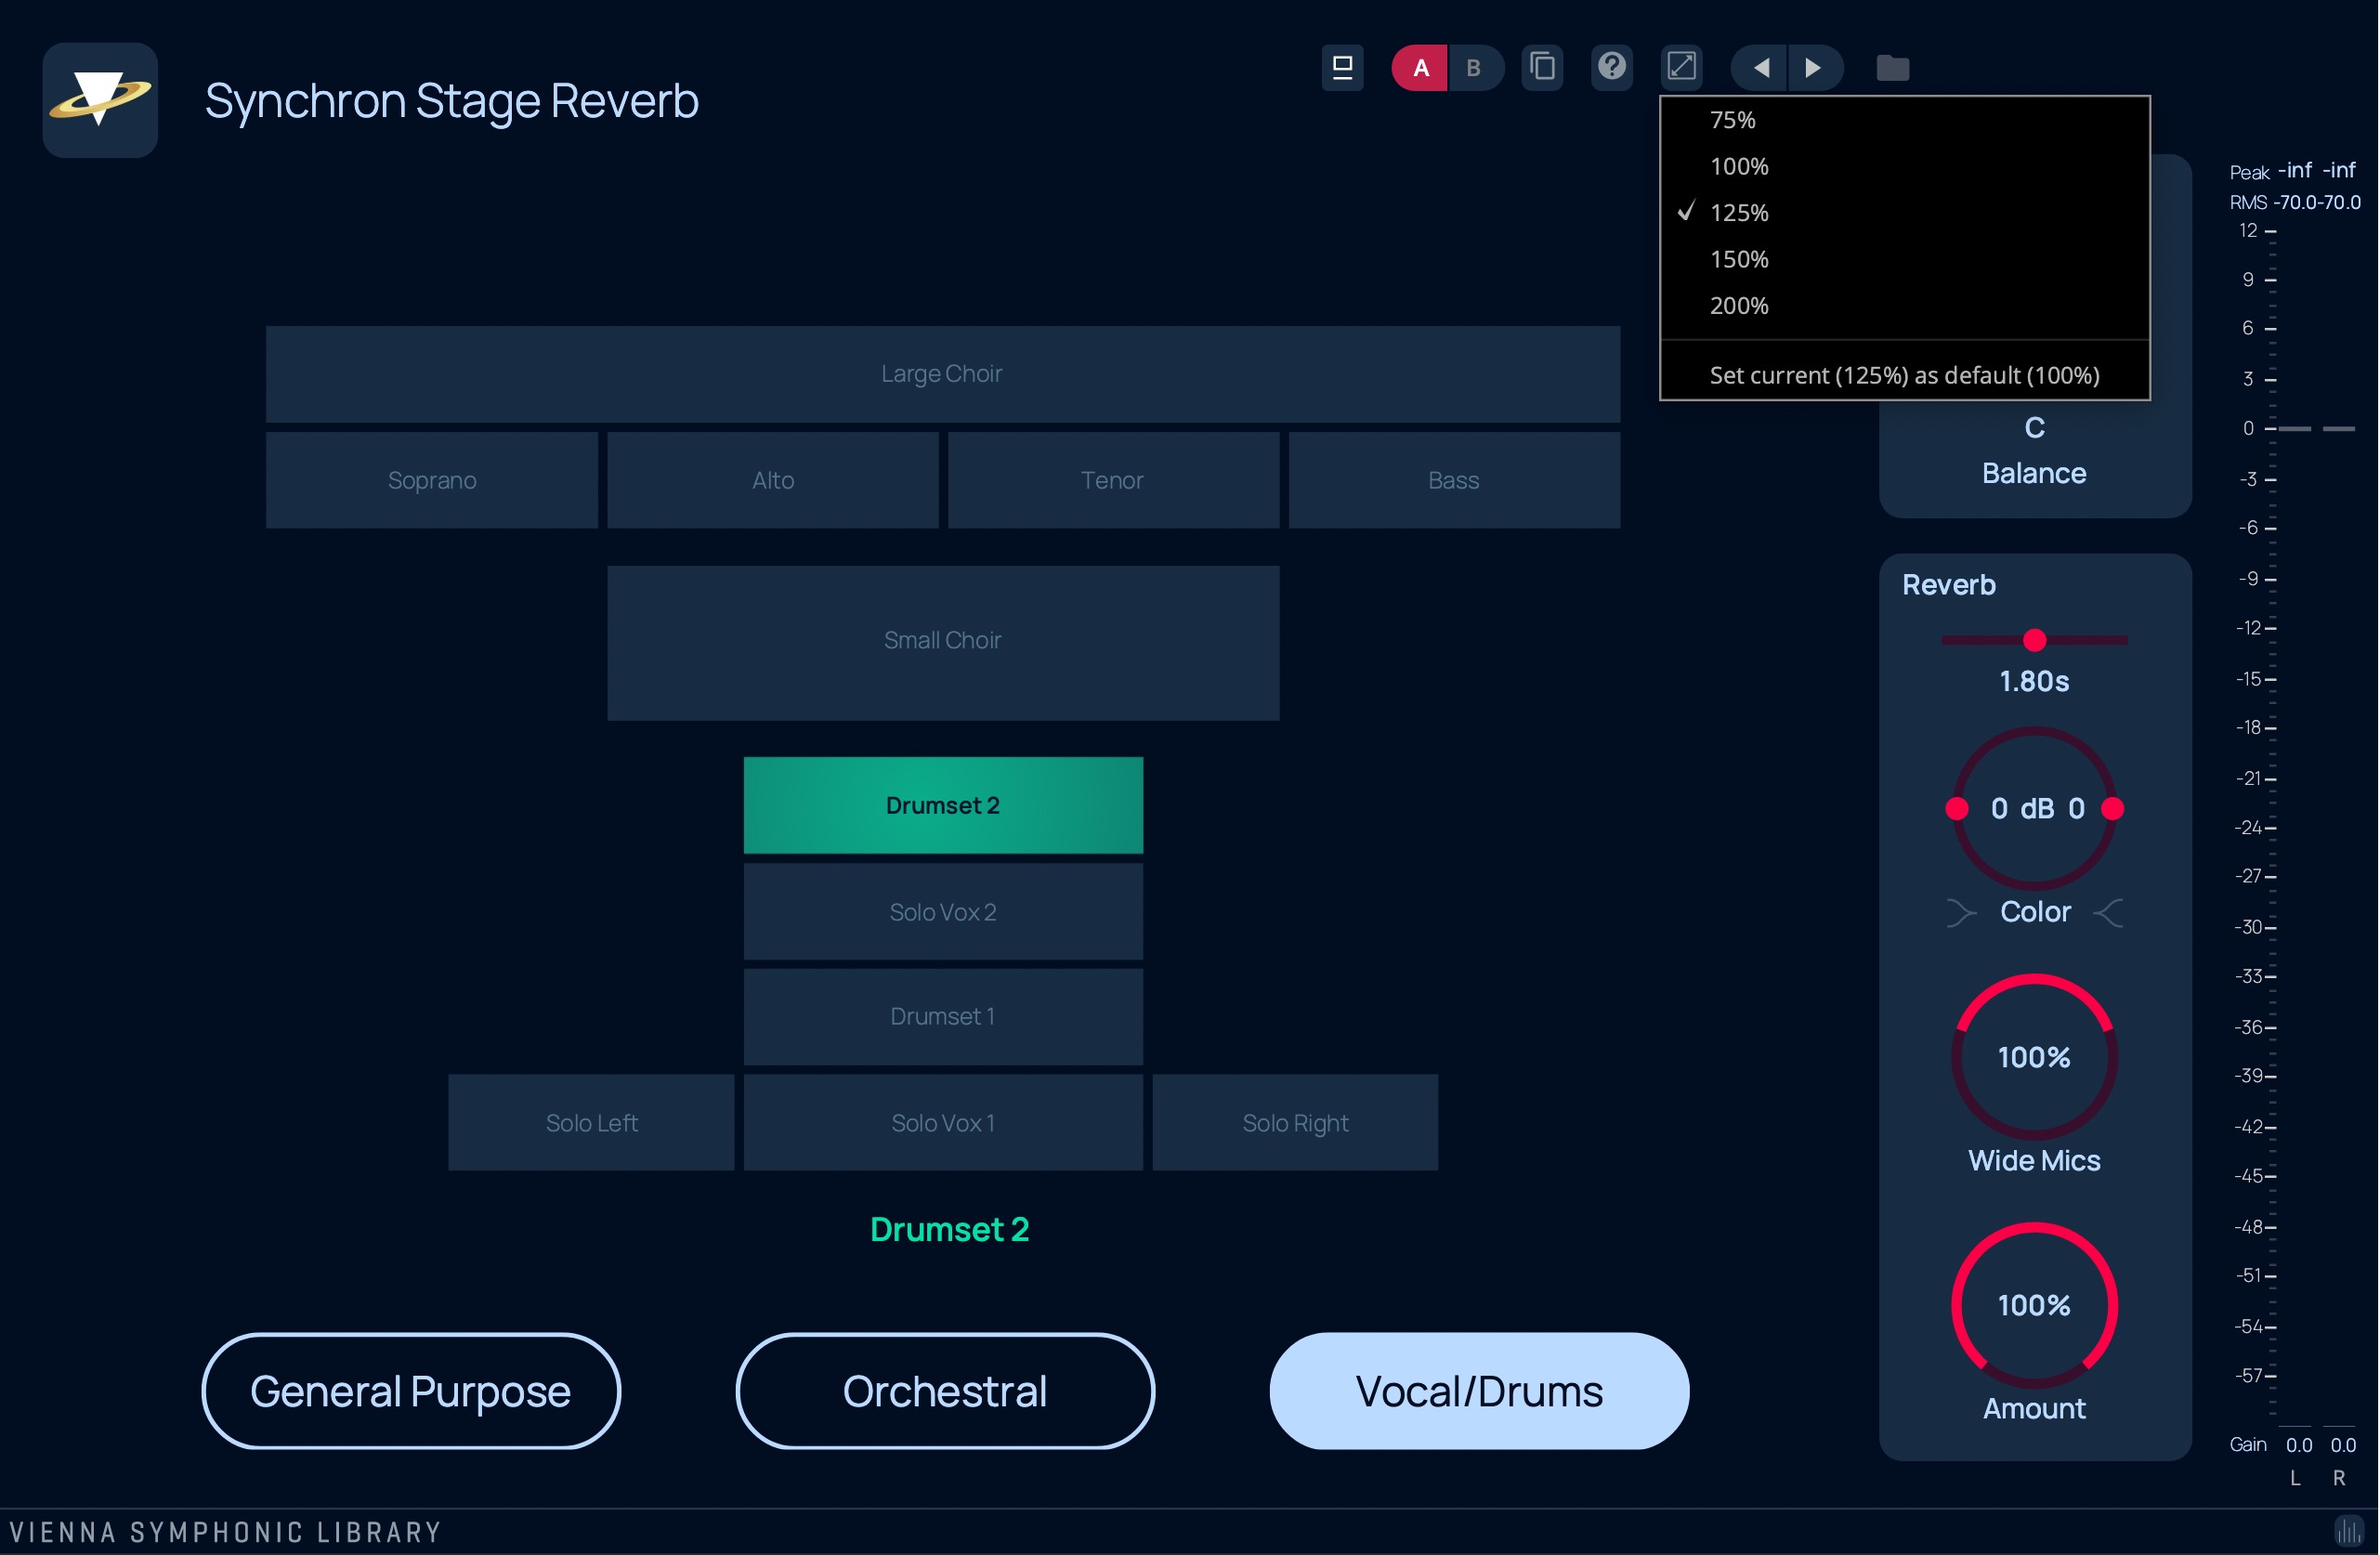
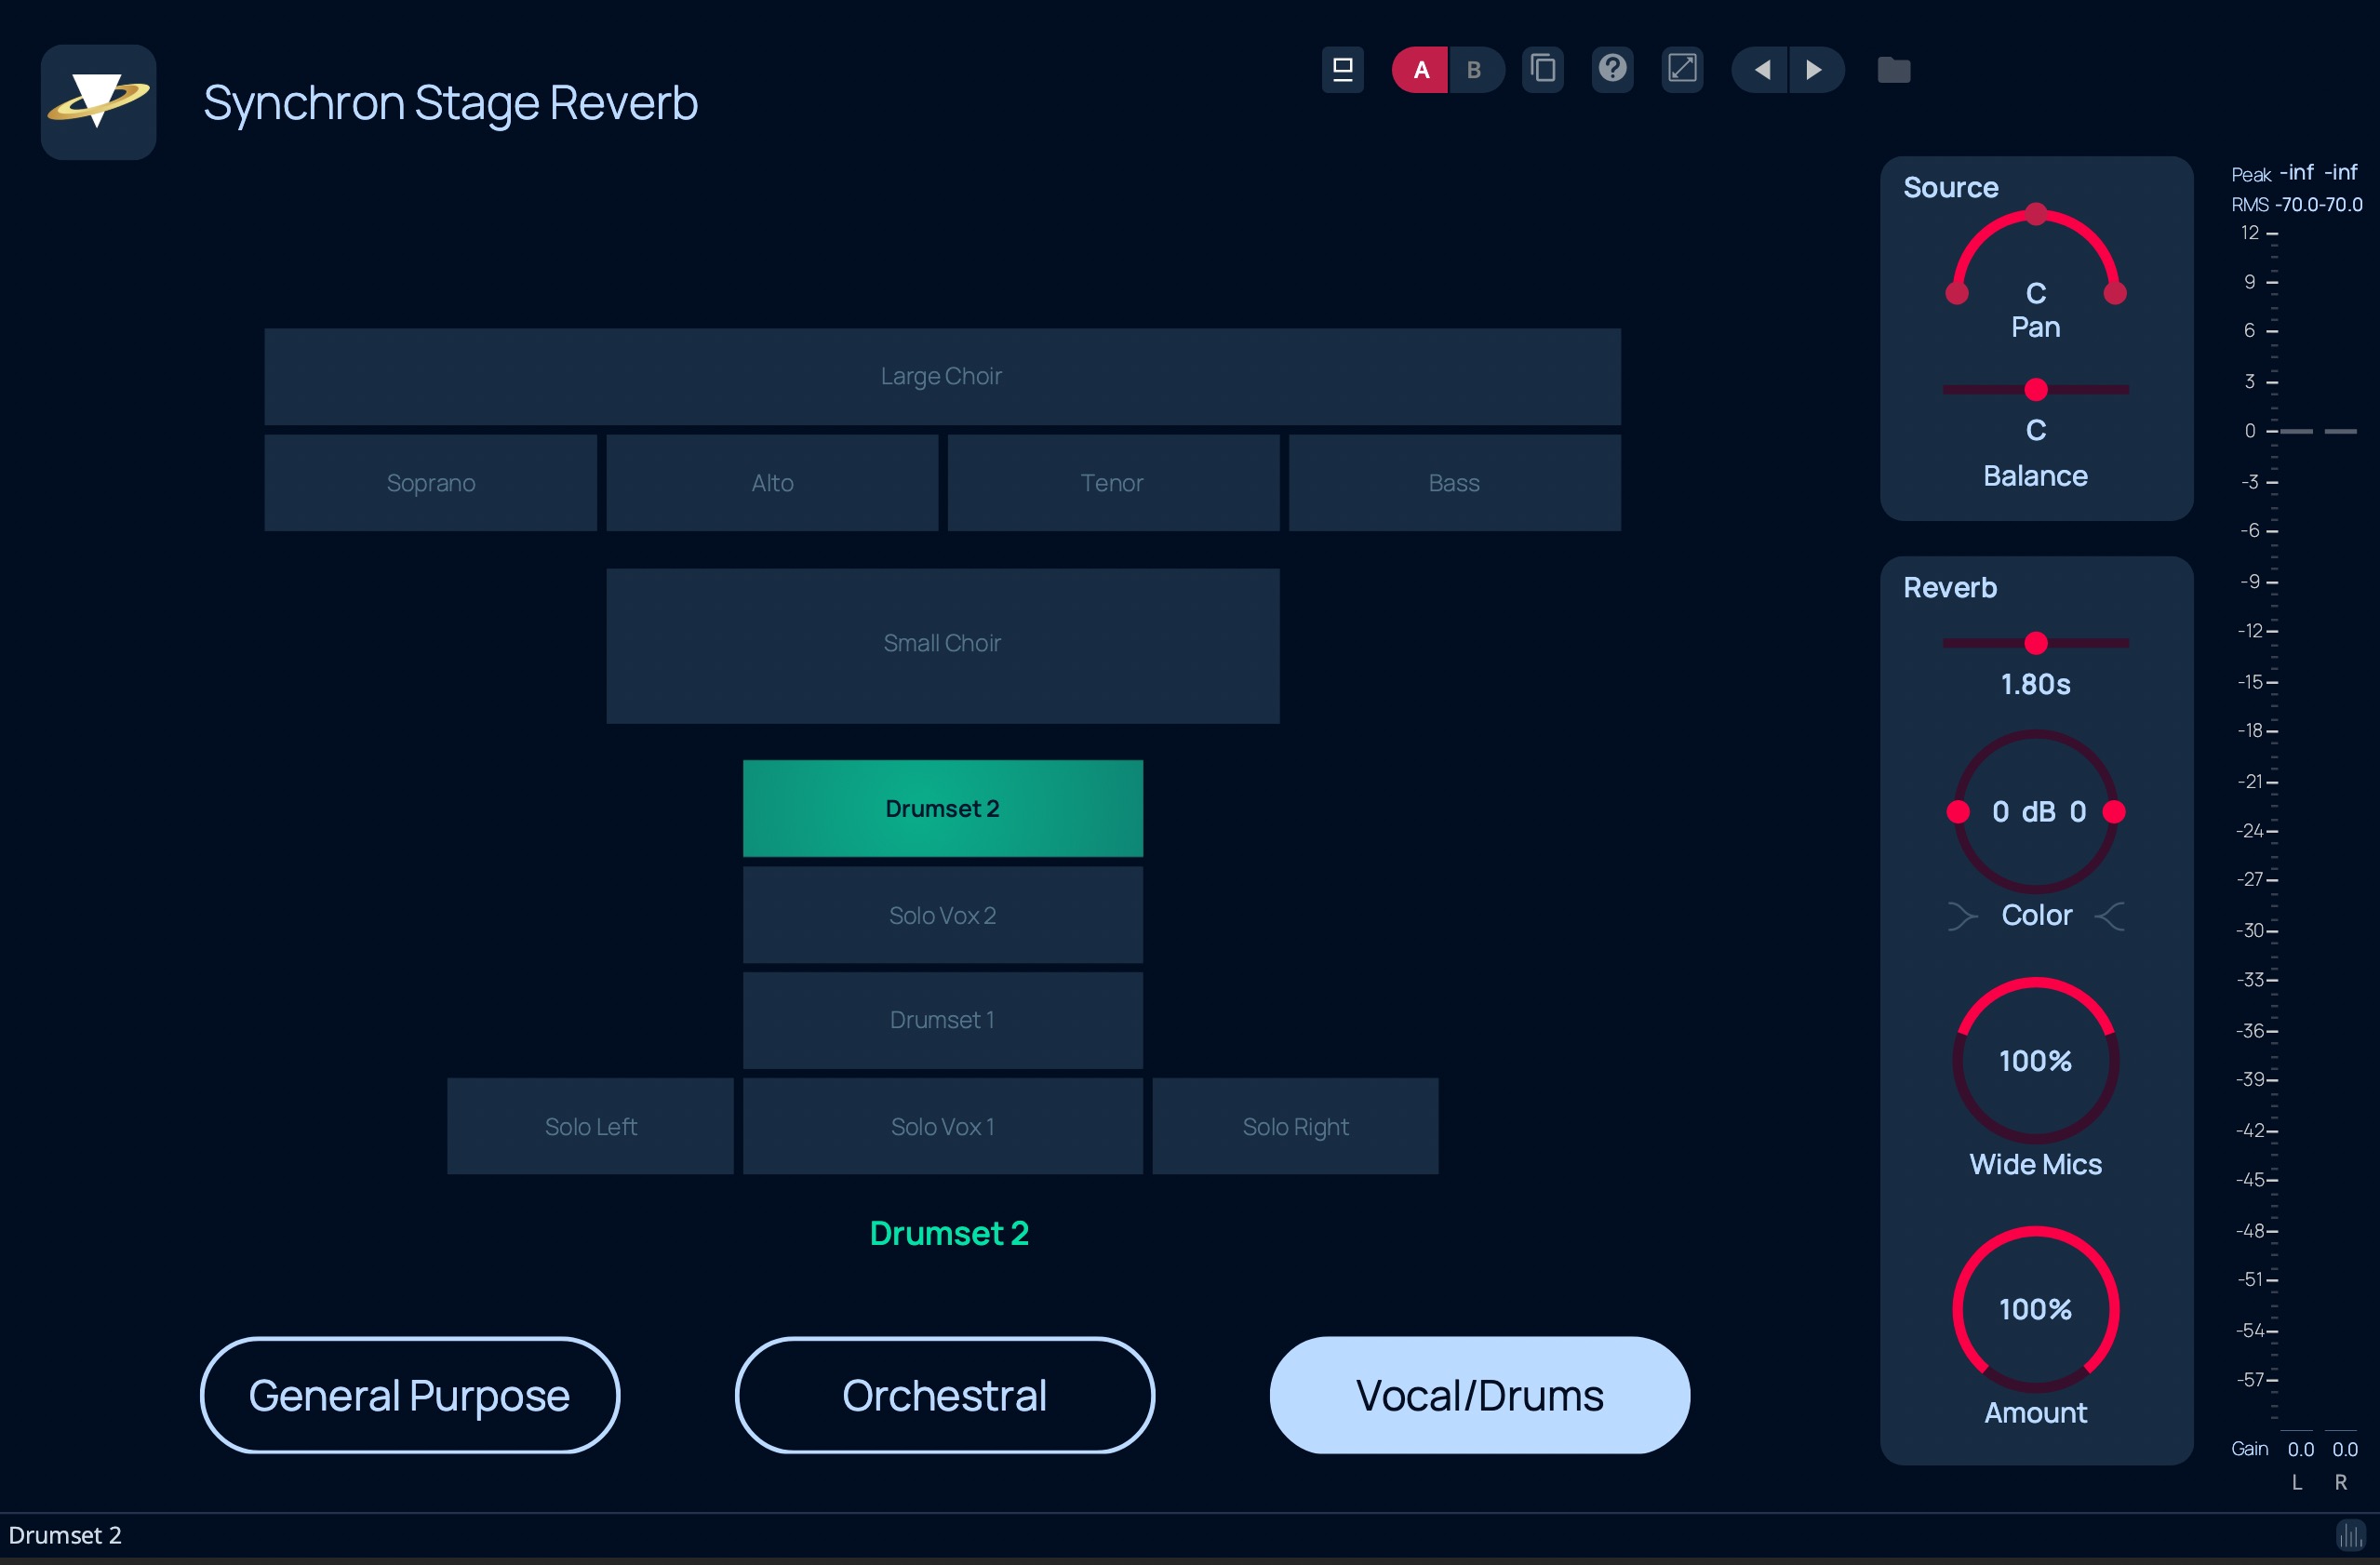
Vocal/Drums
The name says it all: this preset is dedicated to solo voices, choirs, and drumsets. You can choose from:
Solo Vox 1/2, Solo Left/Right
Drumset 1/2
Soprano, Alto, Tenor, Bass
Small Choir, Large Choir
You can Load and Save your User Presets on your computer and exchange them with other users of the Synchron Stage Reverb. The default path for the Preset Folder is:
Windows:
C:\Users\[YourName]\Documents\VSL\Synchron Stage Reverb\Presets
macOS:
/Users/[YourName]/Documents/VSL/Synchron Stage Reverb/Presets
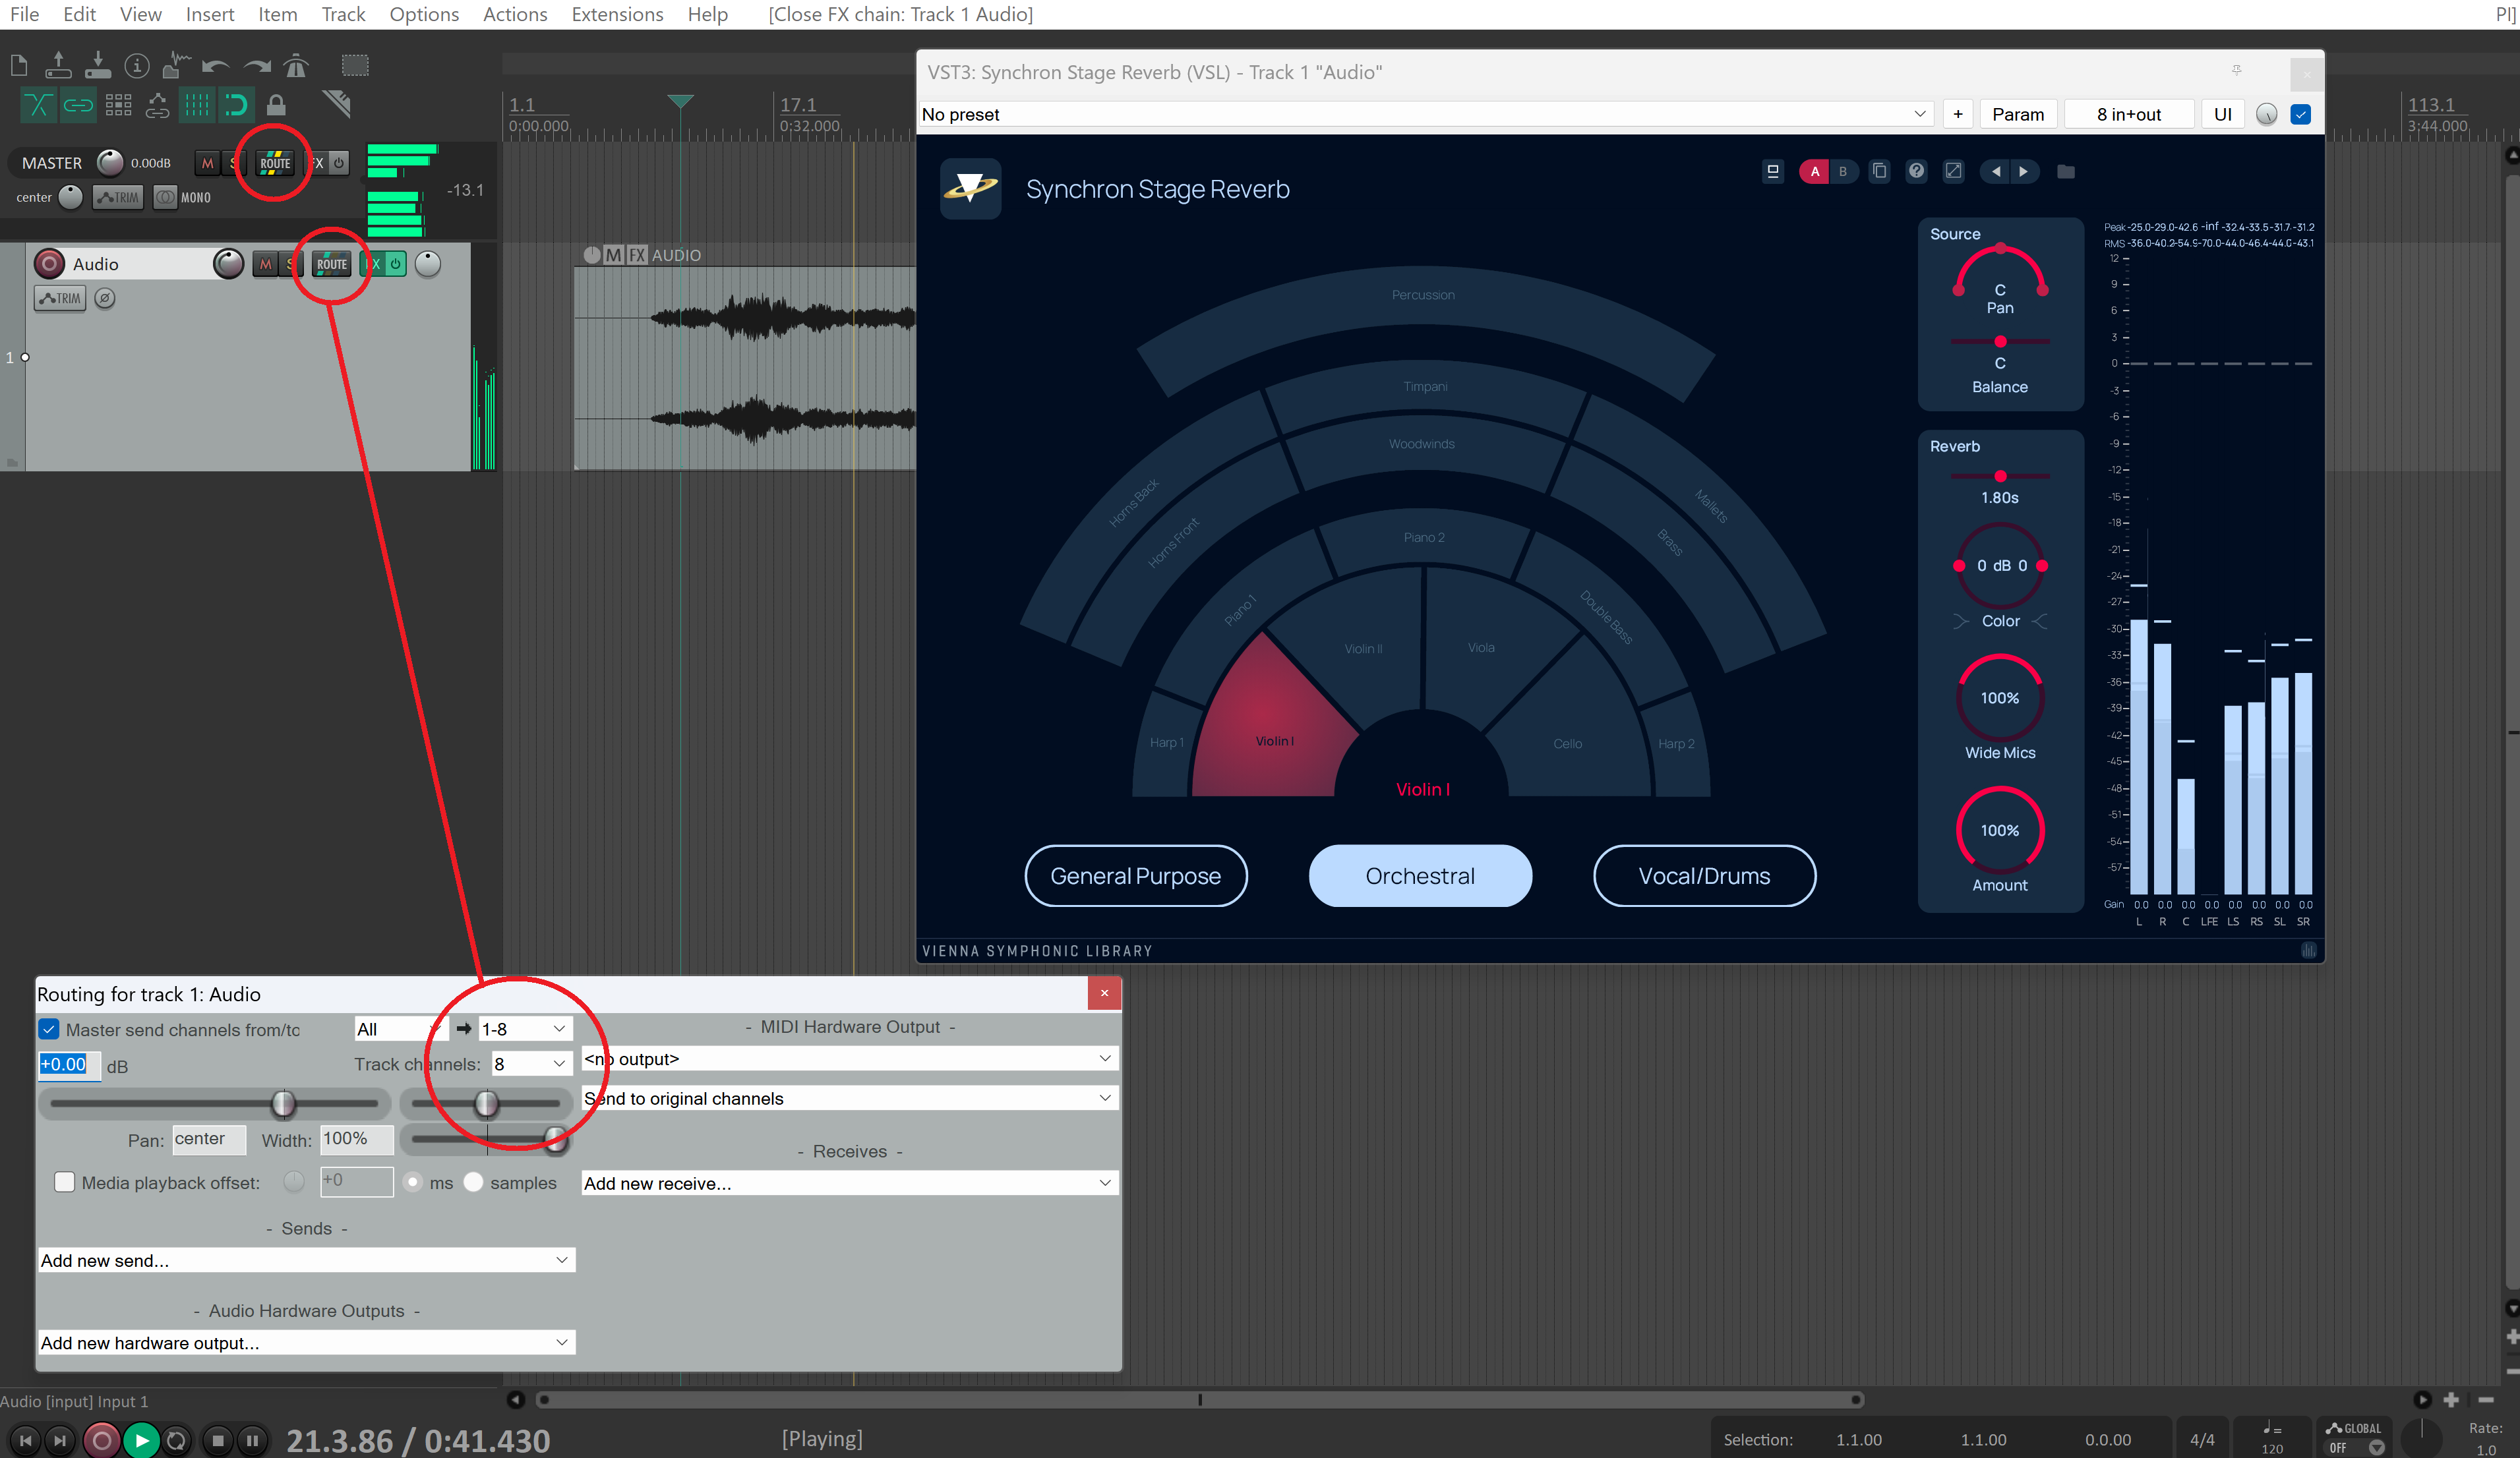
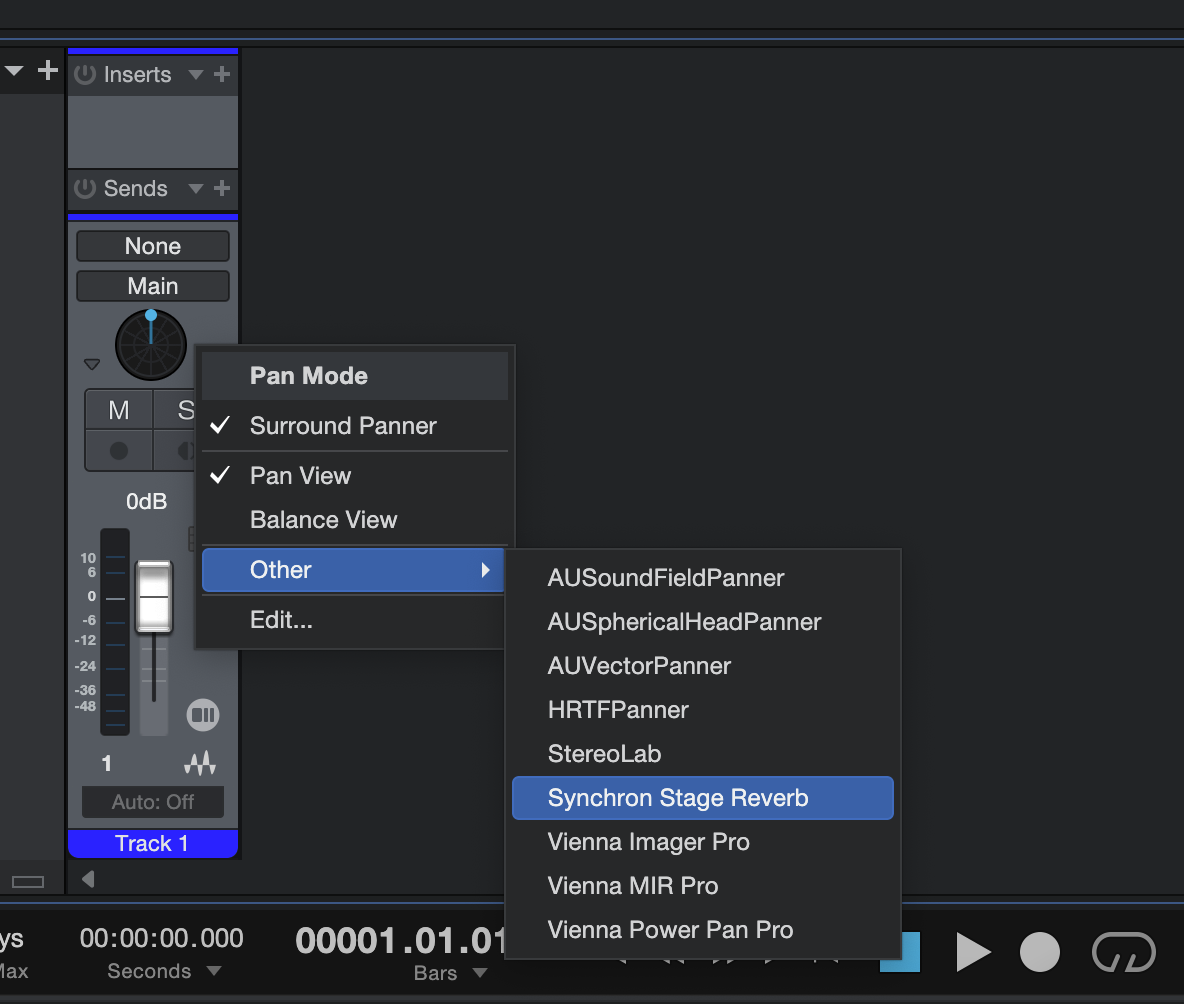
Set up your audio outputs with the configuration you need, then right-click onto the panning field of your mixer channel and select Synchron Stage Reverb. The configuration will adapt to the output format the channel is routed to.
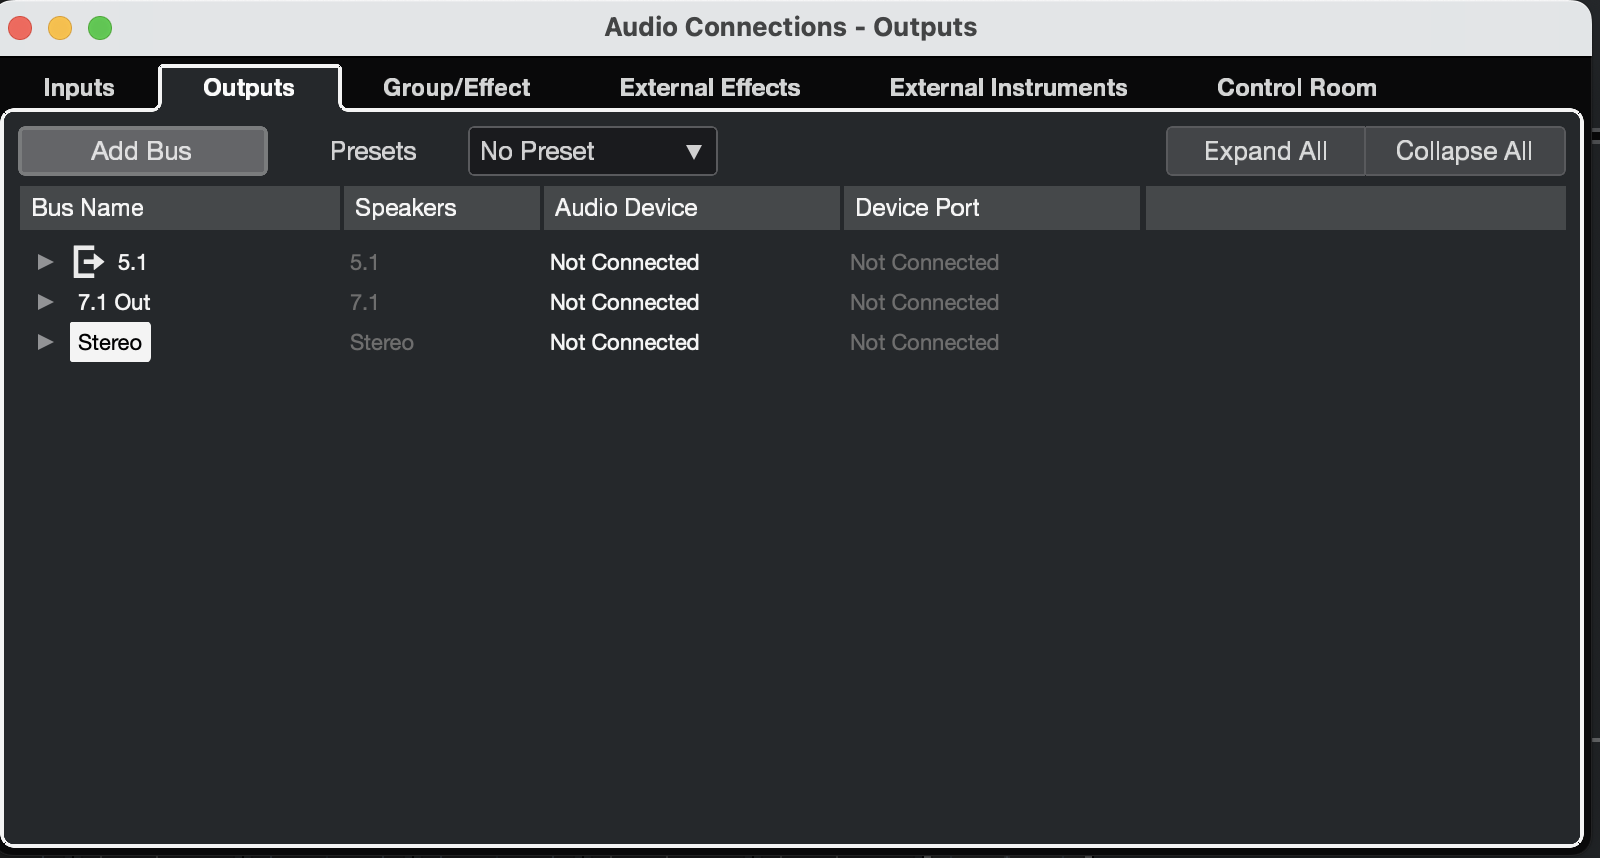
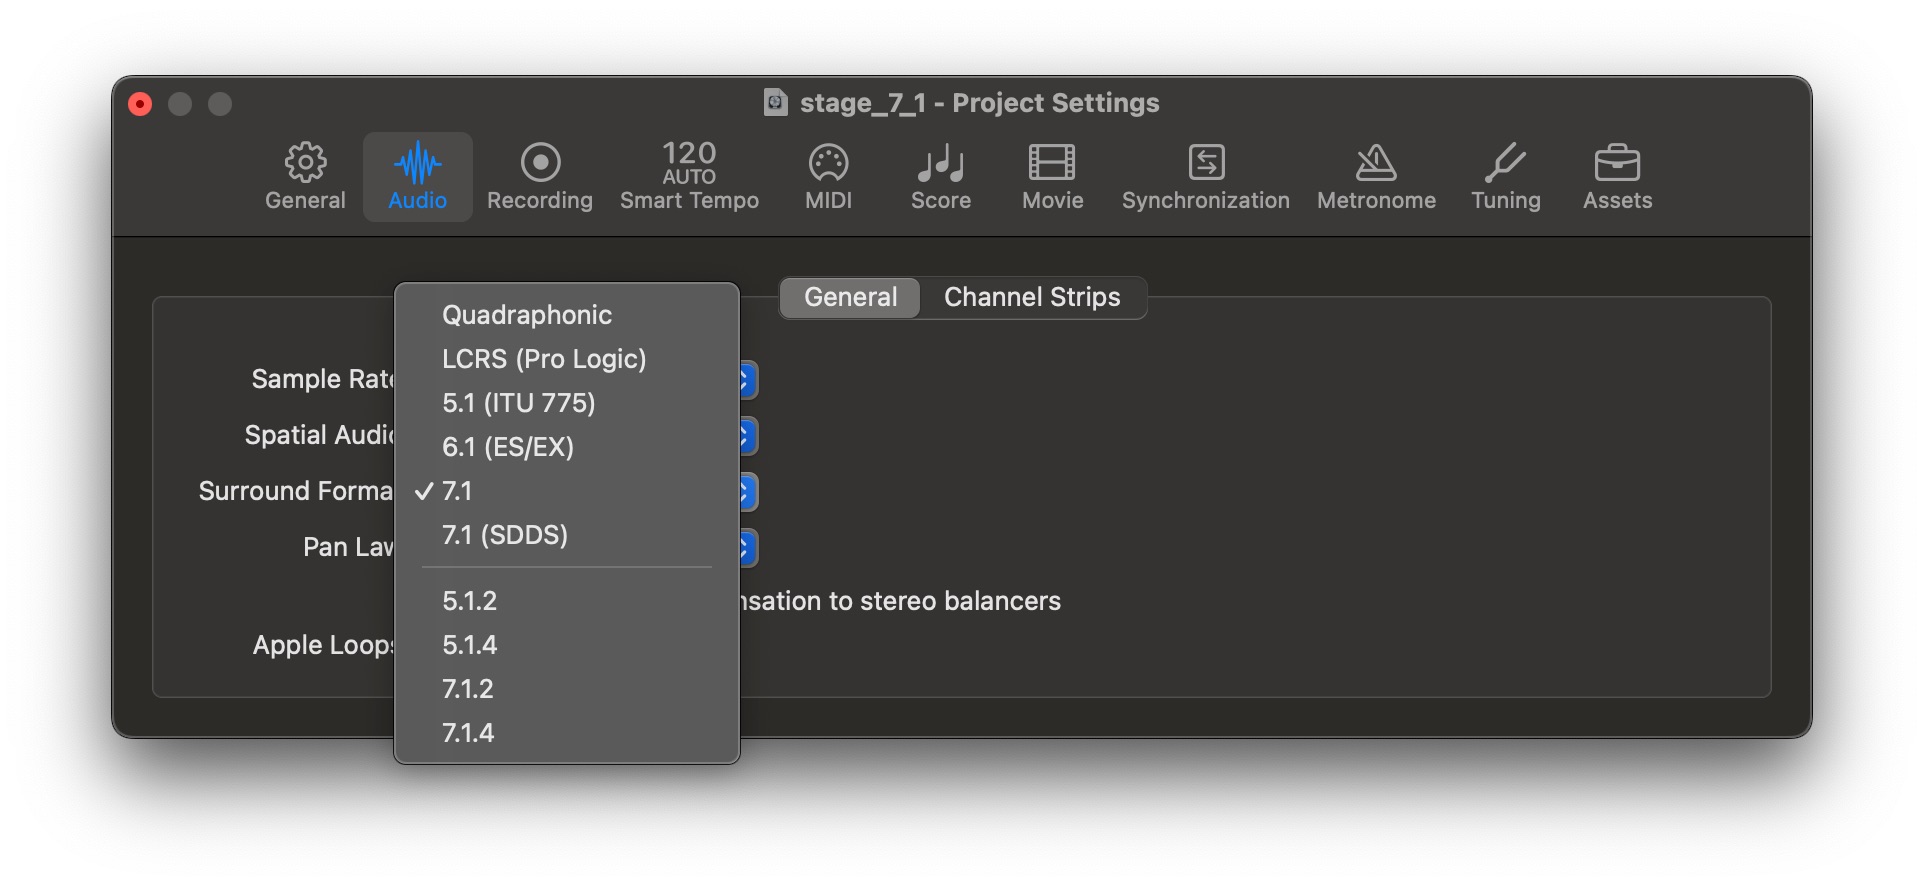
Make sure to set your project settings to 7.1 and insert your Synchron Stage Reverb in the correct configuration.
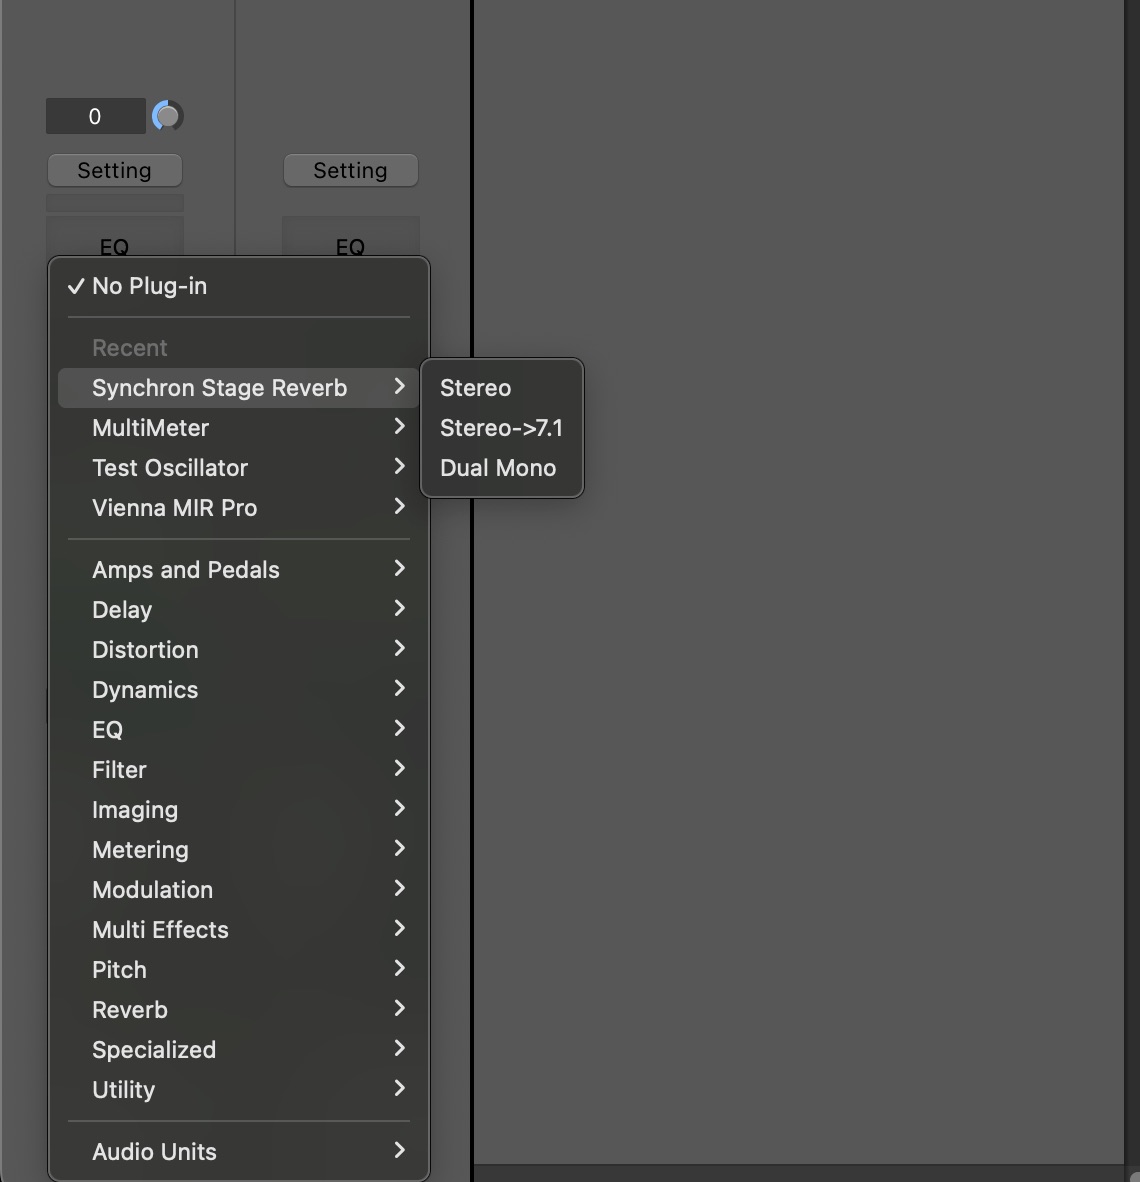
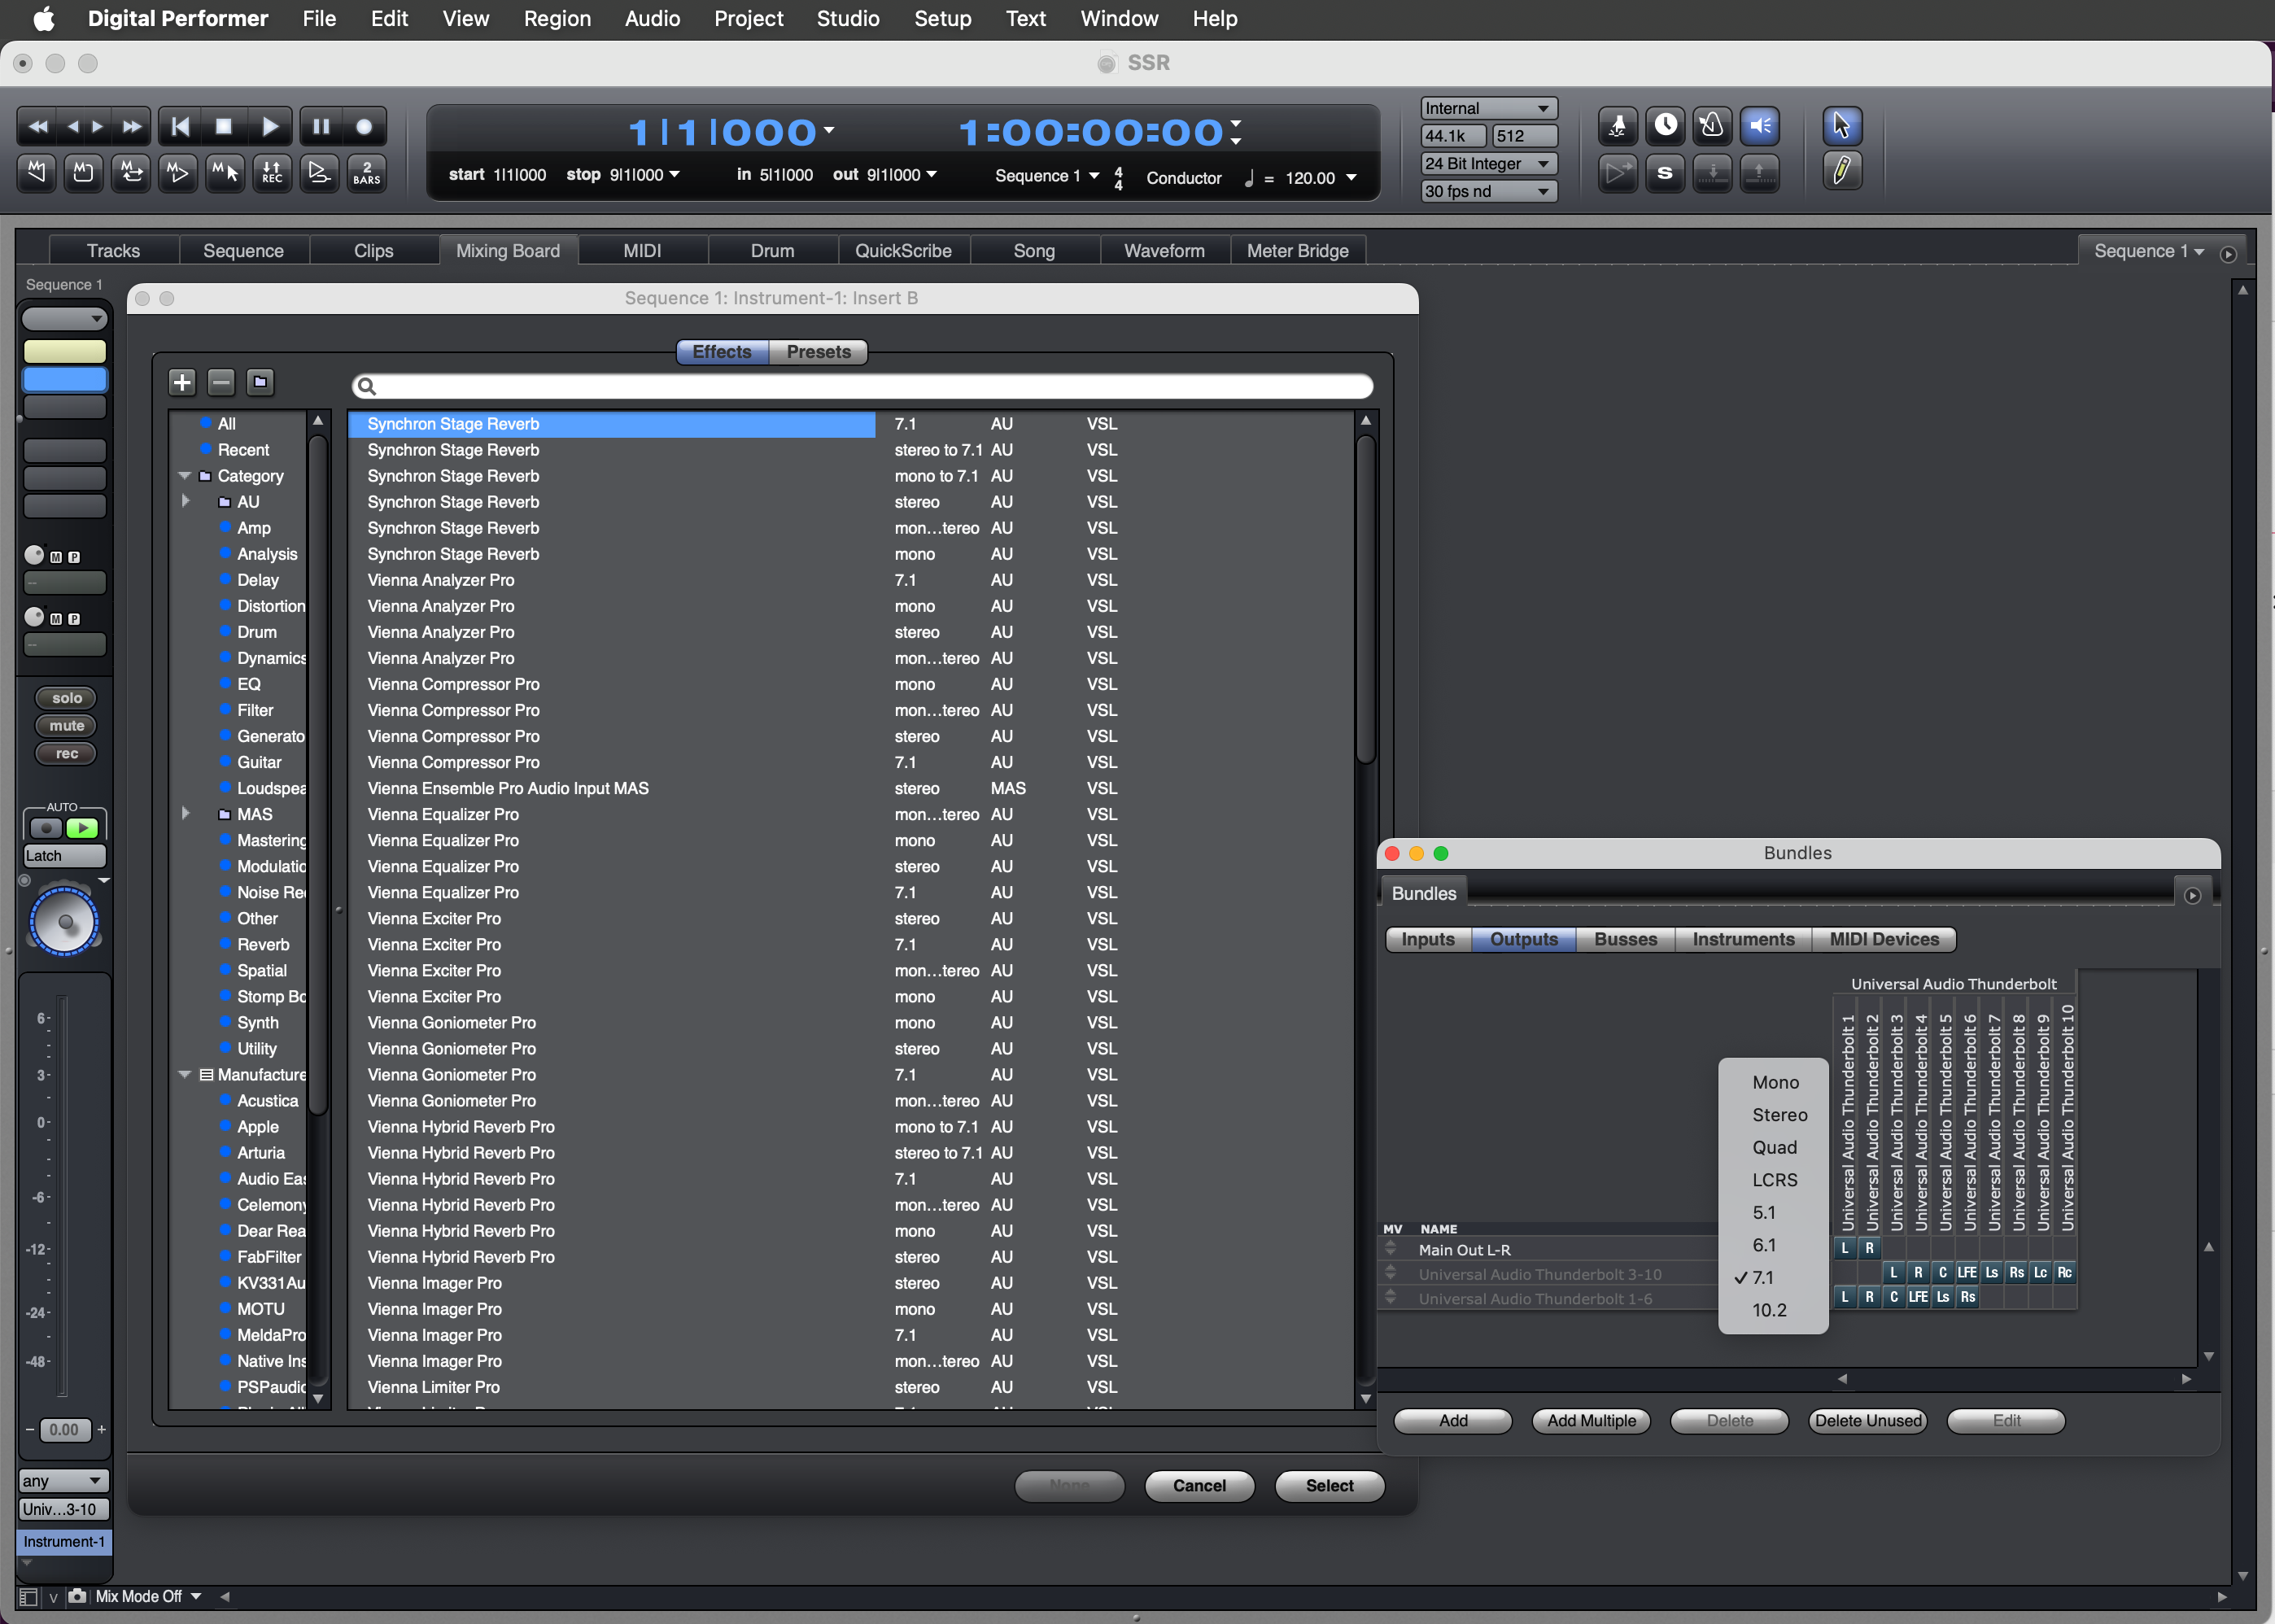
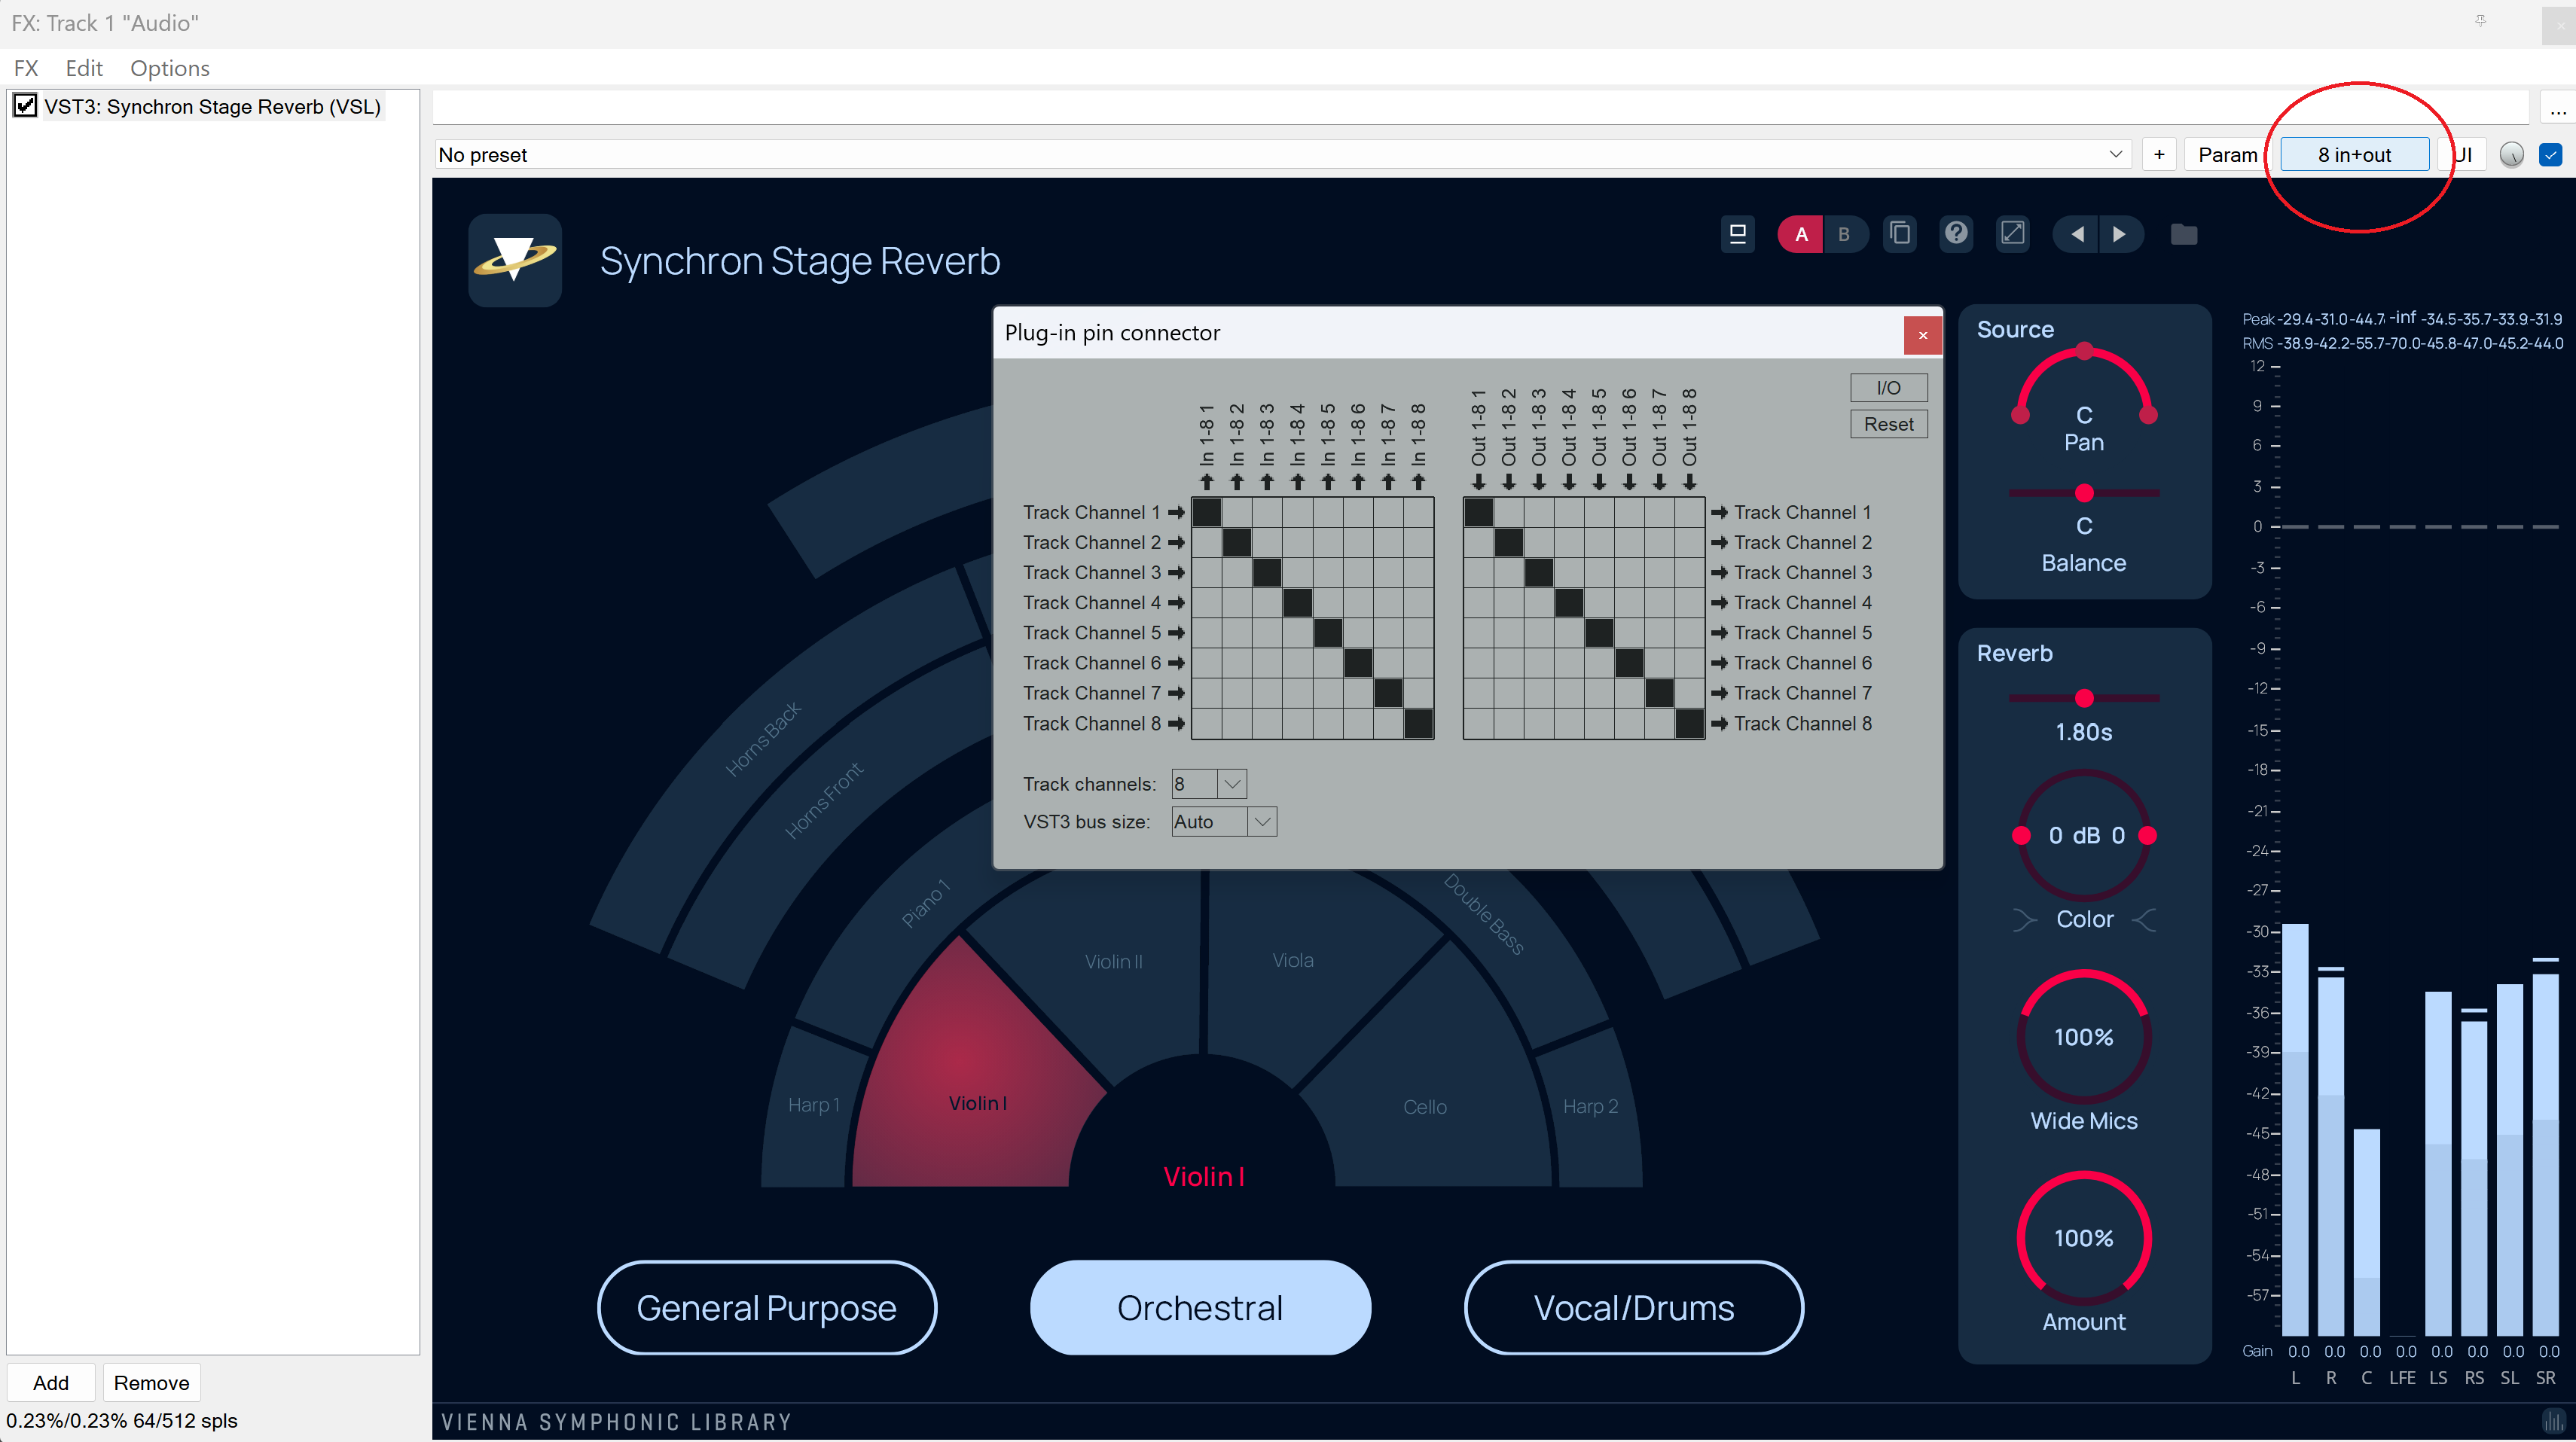
Insert Synchron Stage Reverb as a multichannel plugin and choose the desired configuration for your project.
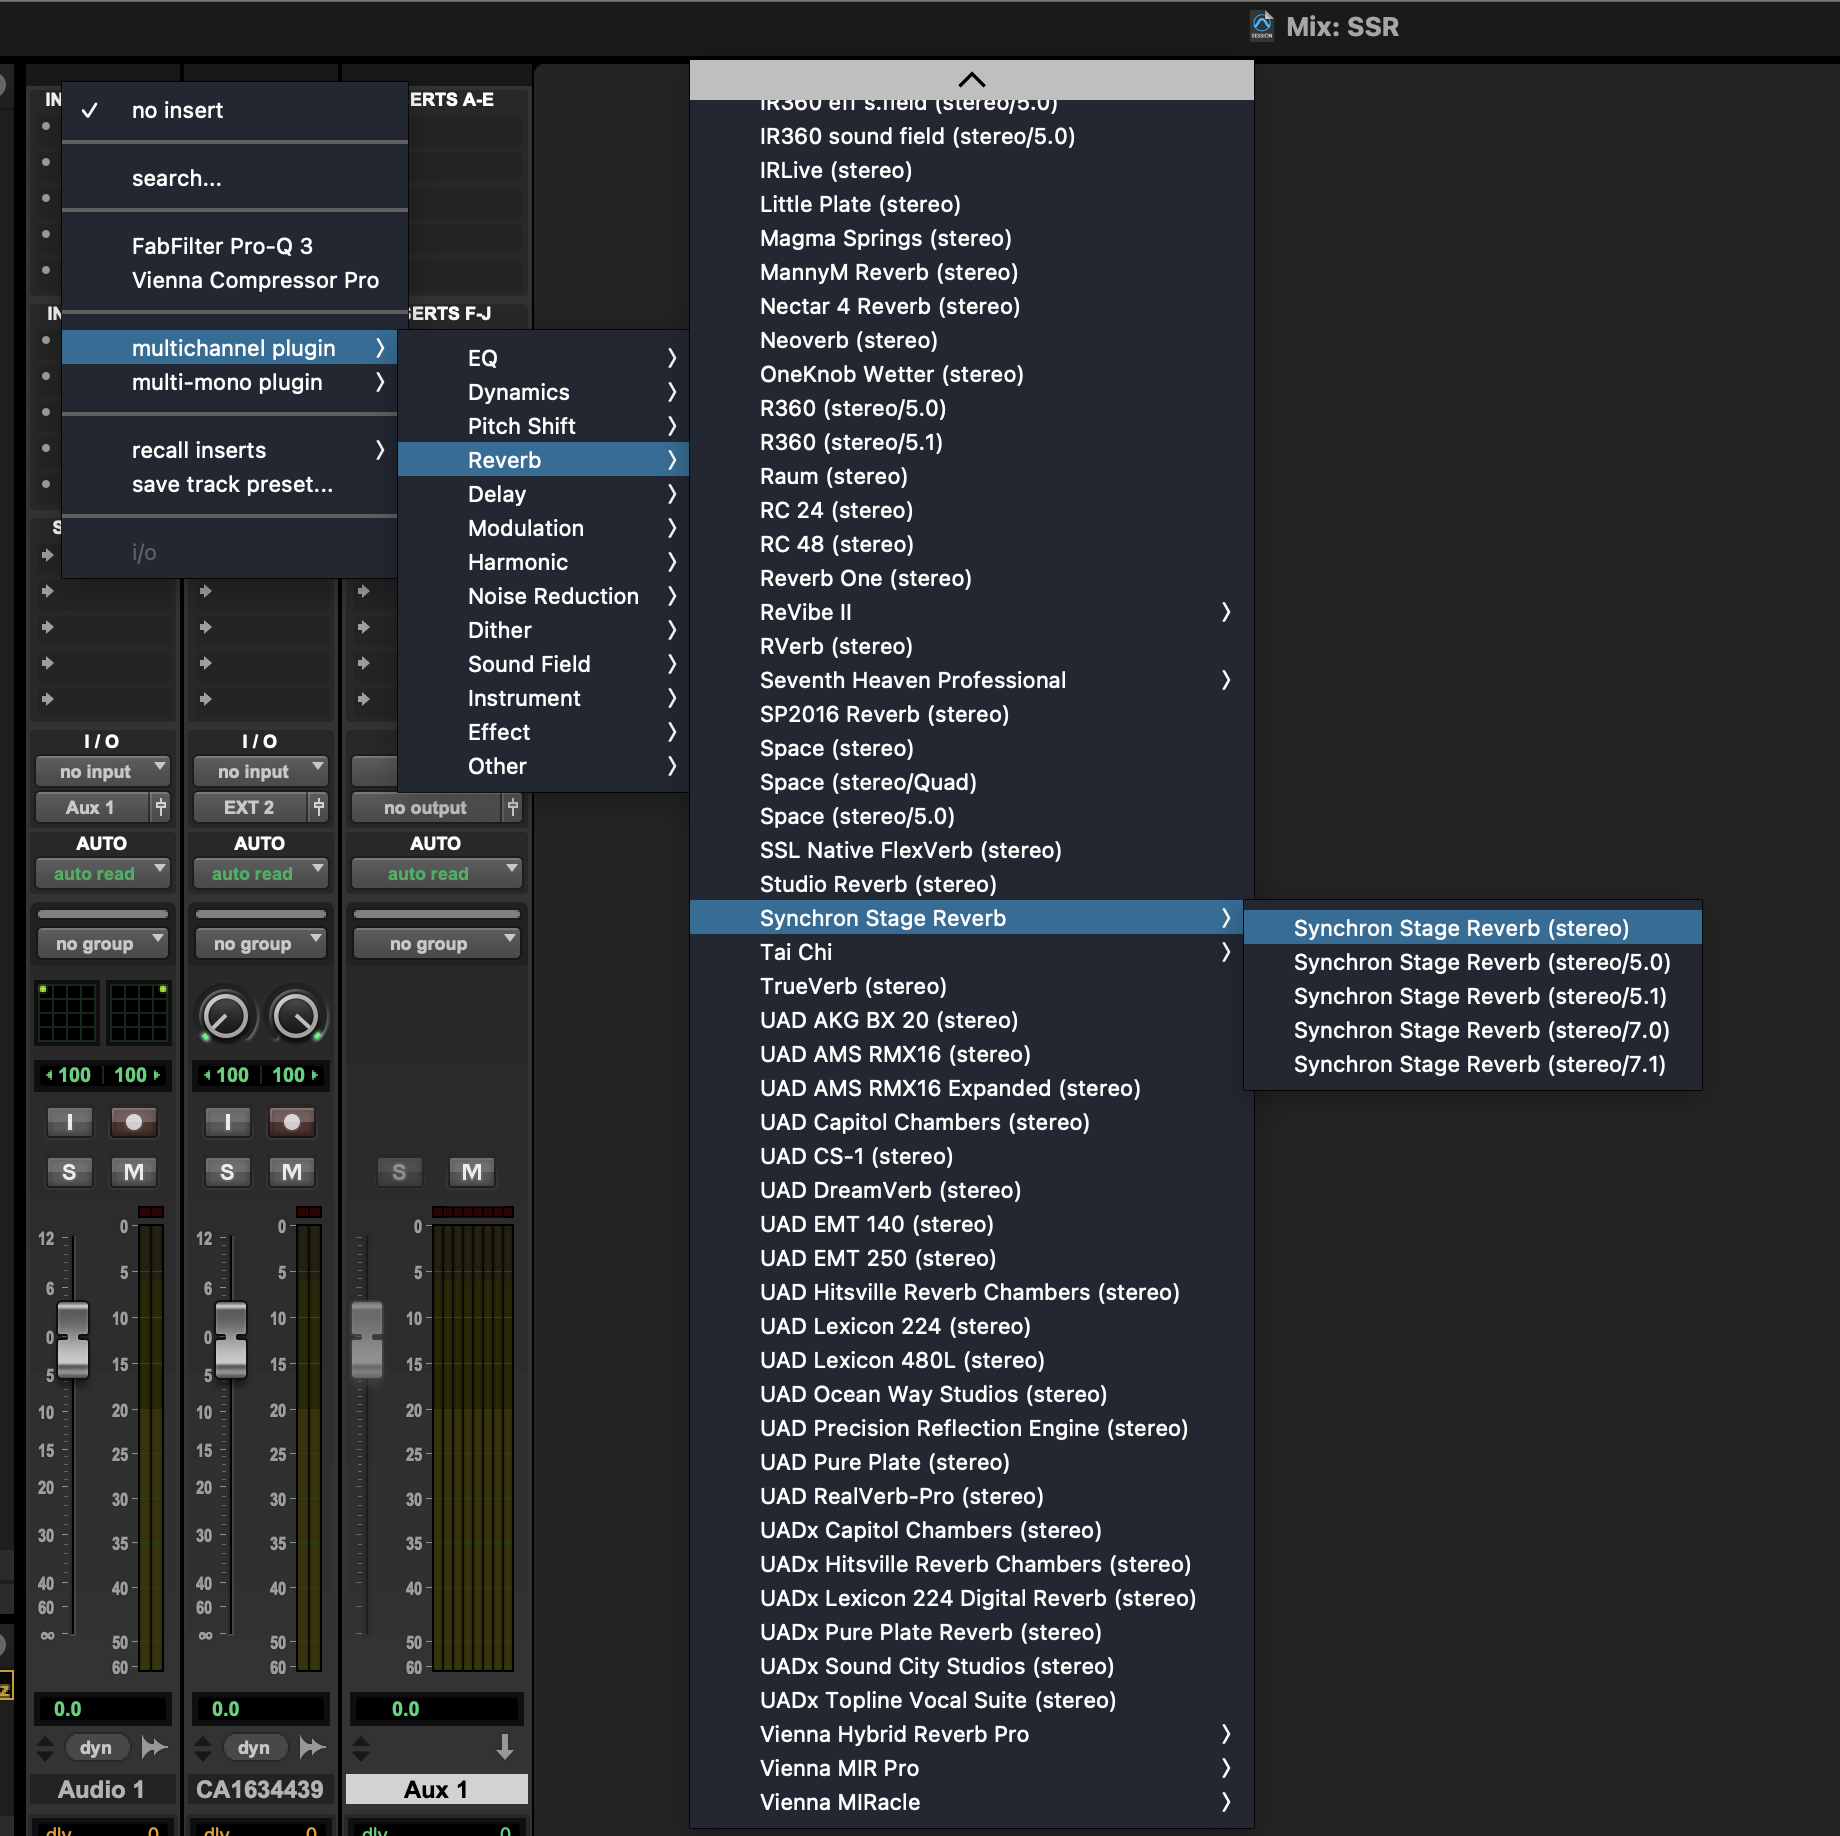
Set up your audio outputs with the configuration you need, then right-click onto the panning field of your mixer channel and select Synchron Stage Reverb. The configuration will adapt to the output format the channel is routed to.
Set the channel size of your track to 8 or higher (be sure that all tracks in your audio path have a channel count of > 8 as well, including the master track) and add the Synchron Stage Reverb plugin to your FX chain. It should automatically adapt/update the plugin instance to the surround configuration