The Performances view shows the MIDI that Vienna Performer has captured from your DAW, split into performances, and the render status of each. It is read-only: you cannot move or change notes here. All editing happens in your DAW.
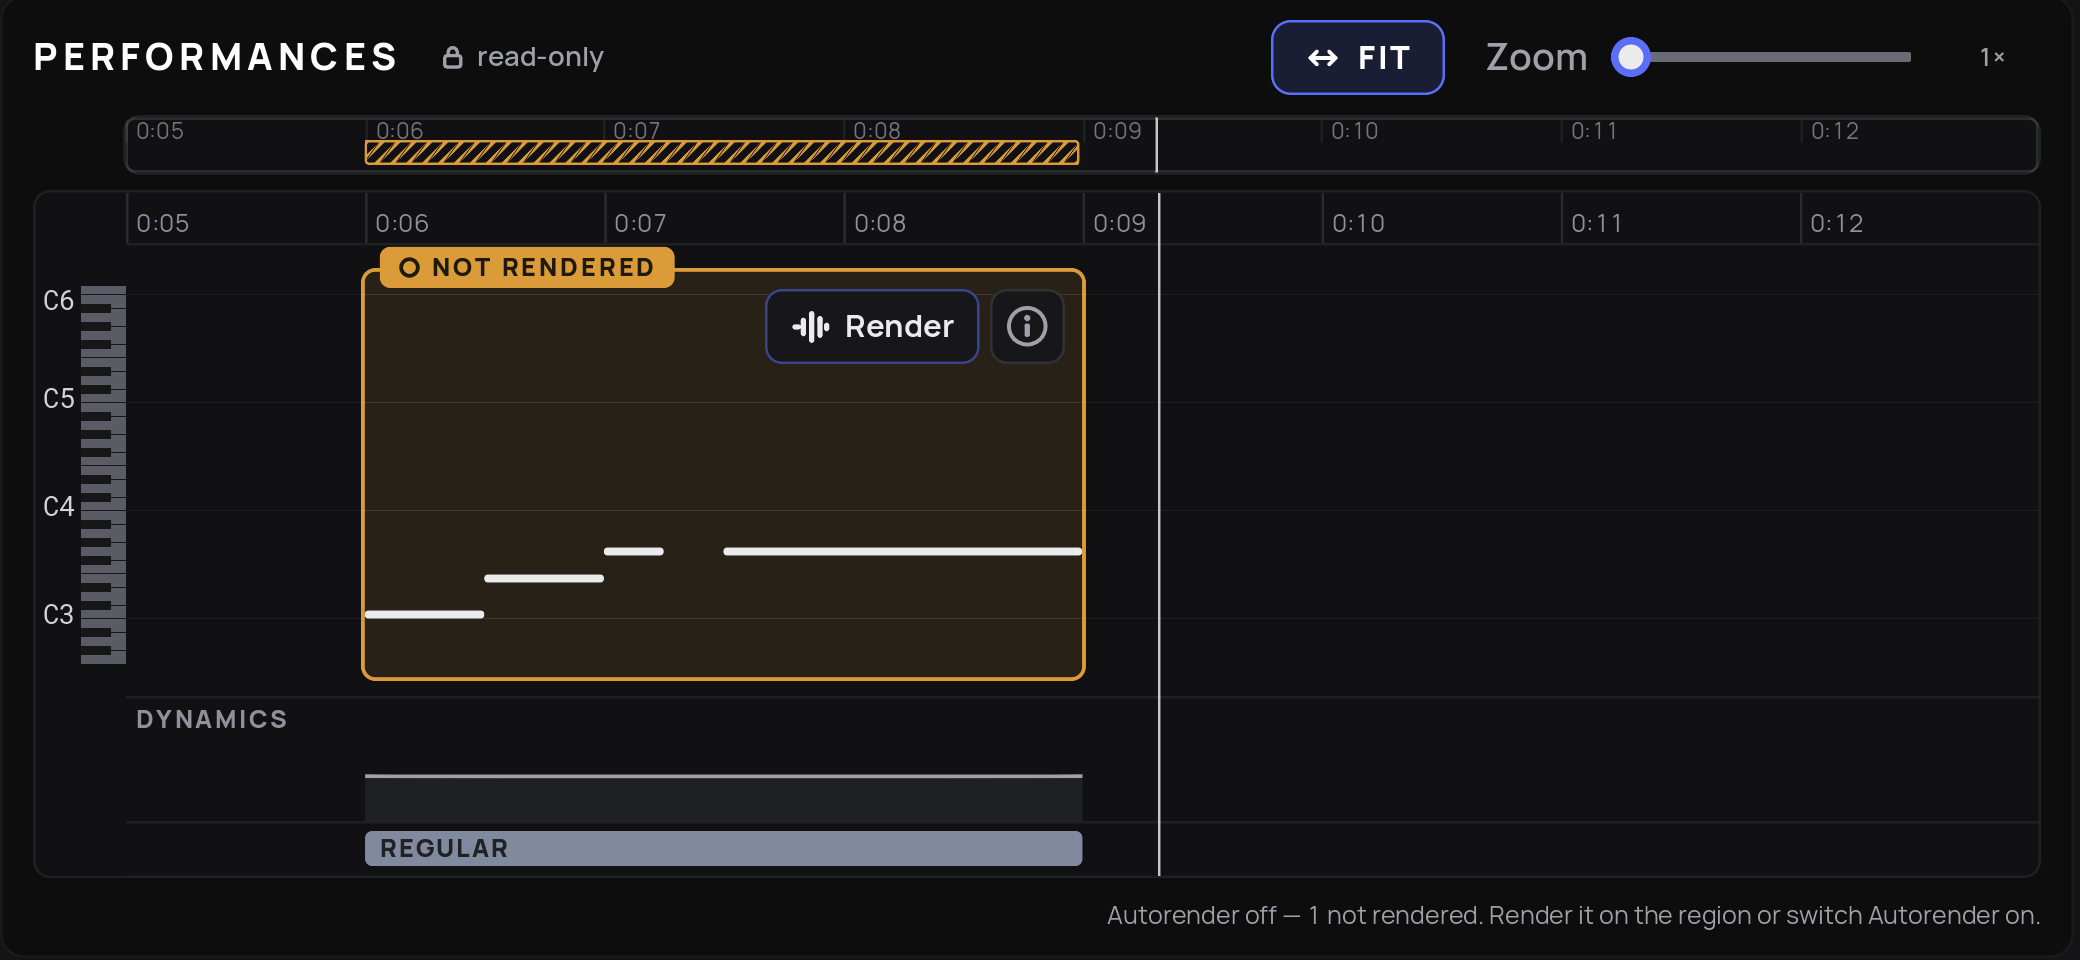
The view shows the MIDI as Vienna Performer will play it, after clean-up, not the raw data from your DAW. Below the notes are two lanes:
Dynamics: the dynamics that Vienna Performer has captured, from CC1 or from the velocity of the notes.
Technique: a coloured bar per technique (for example Regular, Pizzicato, Tremolo), in the colours of the Instrument area.
The line below the view tells you what is happening, for example "Waiting for your DAW to play", "Capture on – nothing captured yet" or "4 performances captured – capture follows the playhead".
Blue, dashed border – Capturing: MIDI is being captured right now.
Blue, solid border – Rendering: the performance is being rendered on the server.
Orange – Not rendered: captured, but not rendered yet. Click Render on the block to render this performance only. Click Autorender to render all performances of this plug-in instance.
Green – Rendered: the render is ready and plays back with your project.
Red – Failed: the render failed, for example because you do not have enough credits for it. Vienna Performer retries on its own if the render servers report when to try again. Otherwise the performance stays red until you start another render.
Zoom: hold Cmd (macOS) or Ctrl (Windows) and scroll over the performances to zoom in or out at the pointer, or use the Zoom slider.
Move the view: hold Shift and scroll over the performances.
FIT: fits all performances into the view.
Double-click a performance to zoom in on it. Double-click again to fit the view.
Overview strip: the bar above the timeline shows the whole project. Drag the highlighted range to scroll, or drag its handles to zoom.
The timeline shows the time in minutes and seconds.
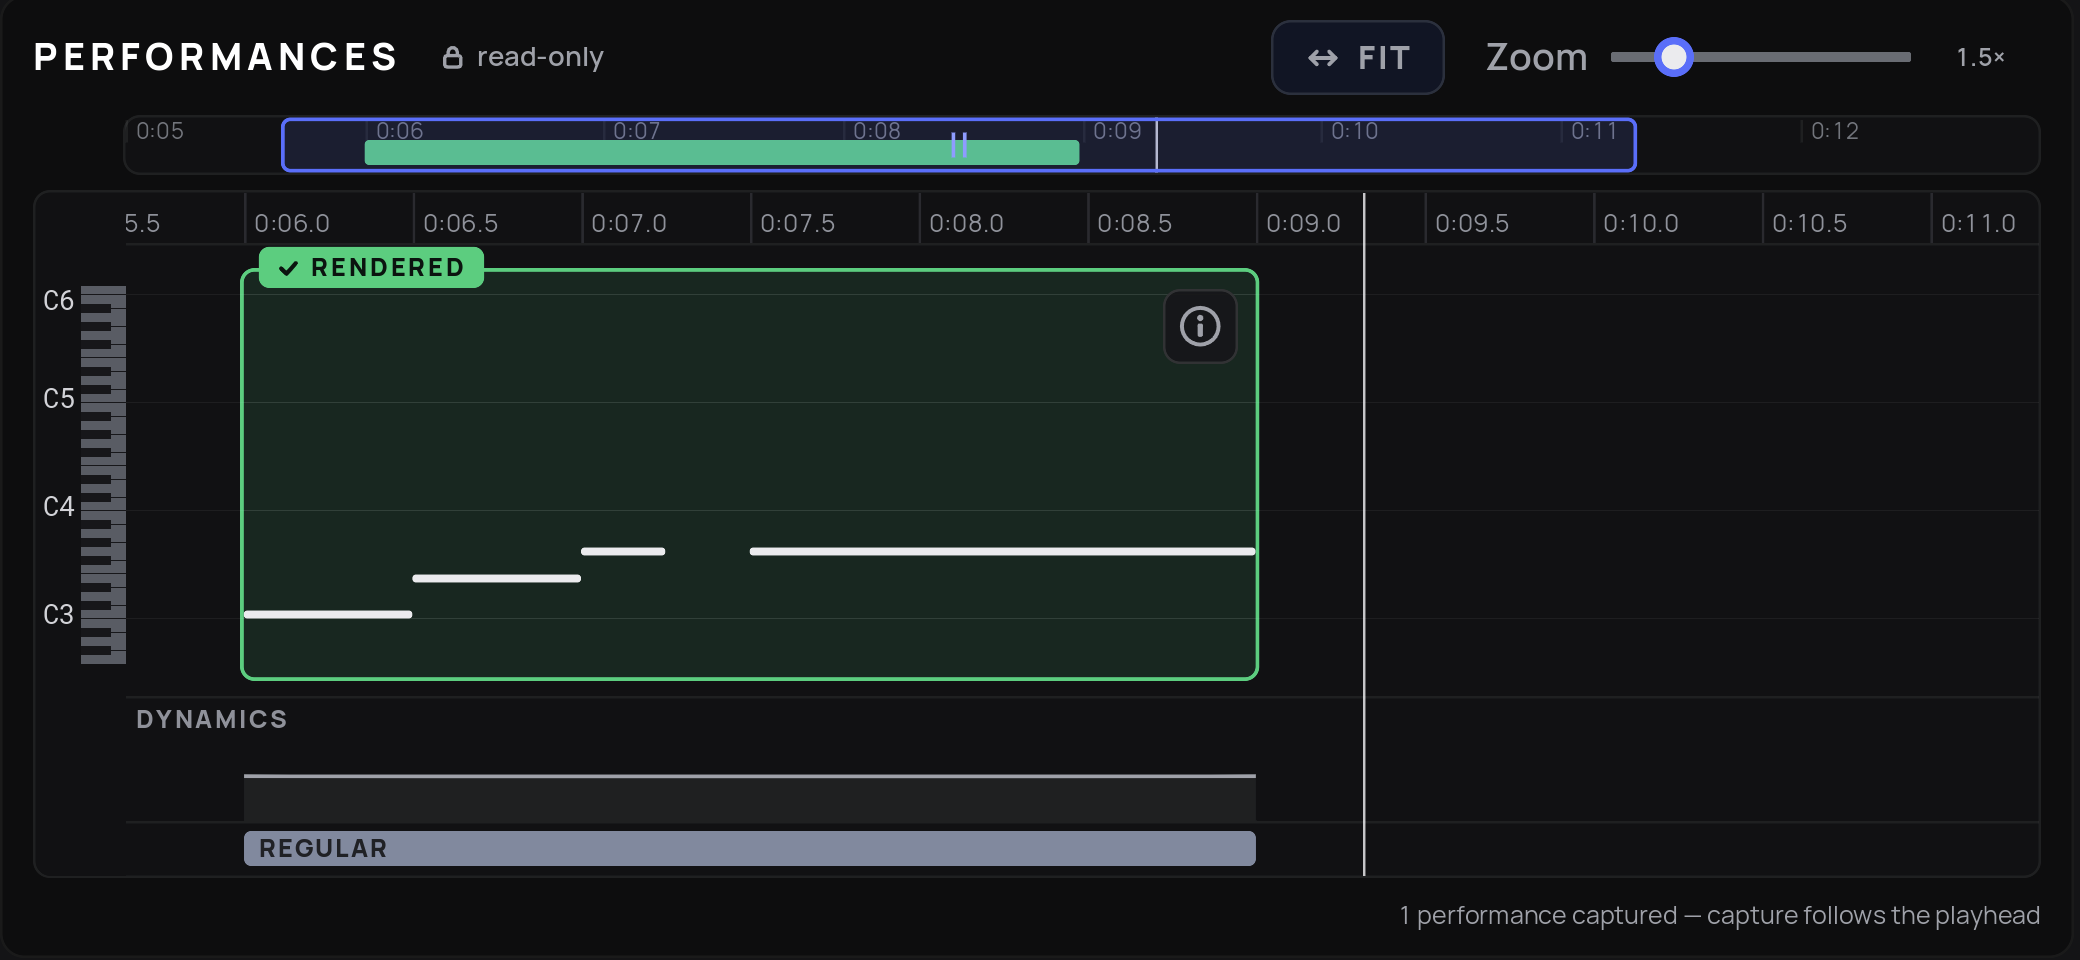
Edit the notes, keyswitches or CC data in your DAW.
With Capture on, play the changed passage (start a little before it and let it run a little past it).
Vienna Performer detects the change and marks the performance Not rendered.
Render it again, with the Render button on the block or with Autorender.
If only the dynamics of a performance change, you keep hearing its existing render, not the preview sound, until it is rendered again.
Tip
Switch Autorender off while you edit. With Autorender on, every captured change is rendered, including changes you did not want.
Click the i button on a performance to show its details:
Time range and status of the performance.
Instrument used for the render.
Render time: the length of the rendered audio, which is what is charged.
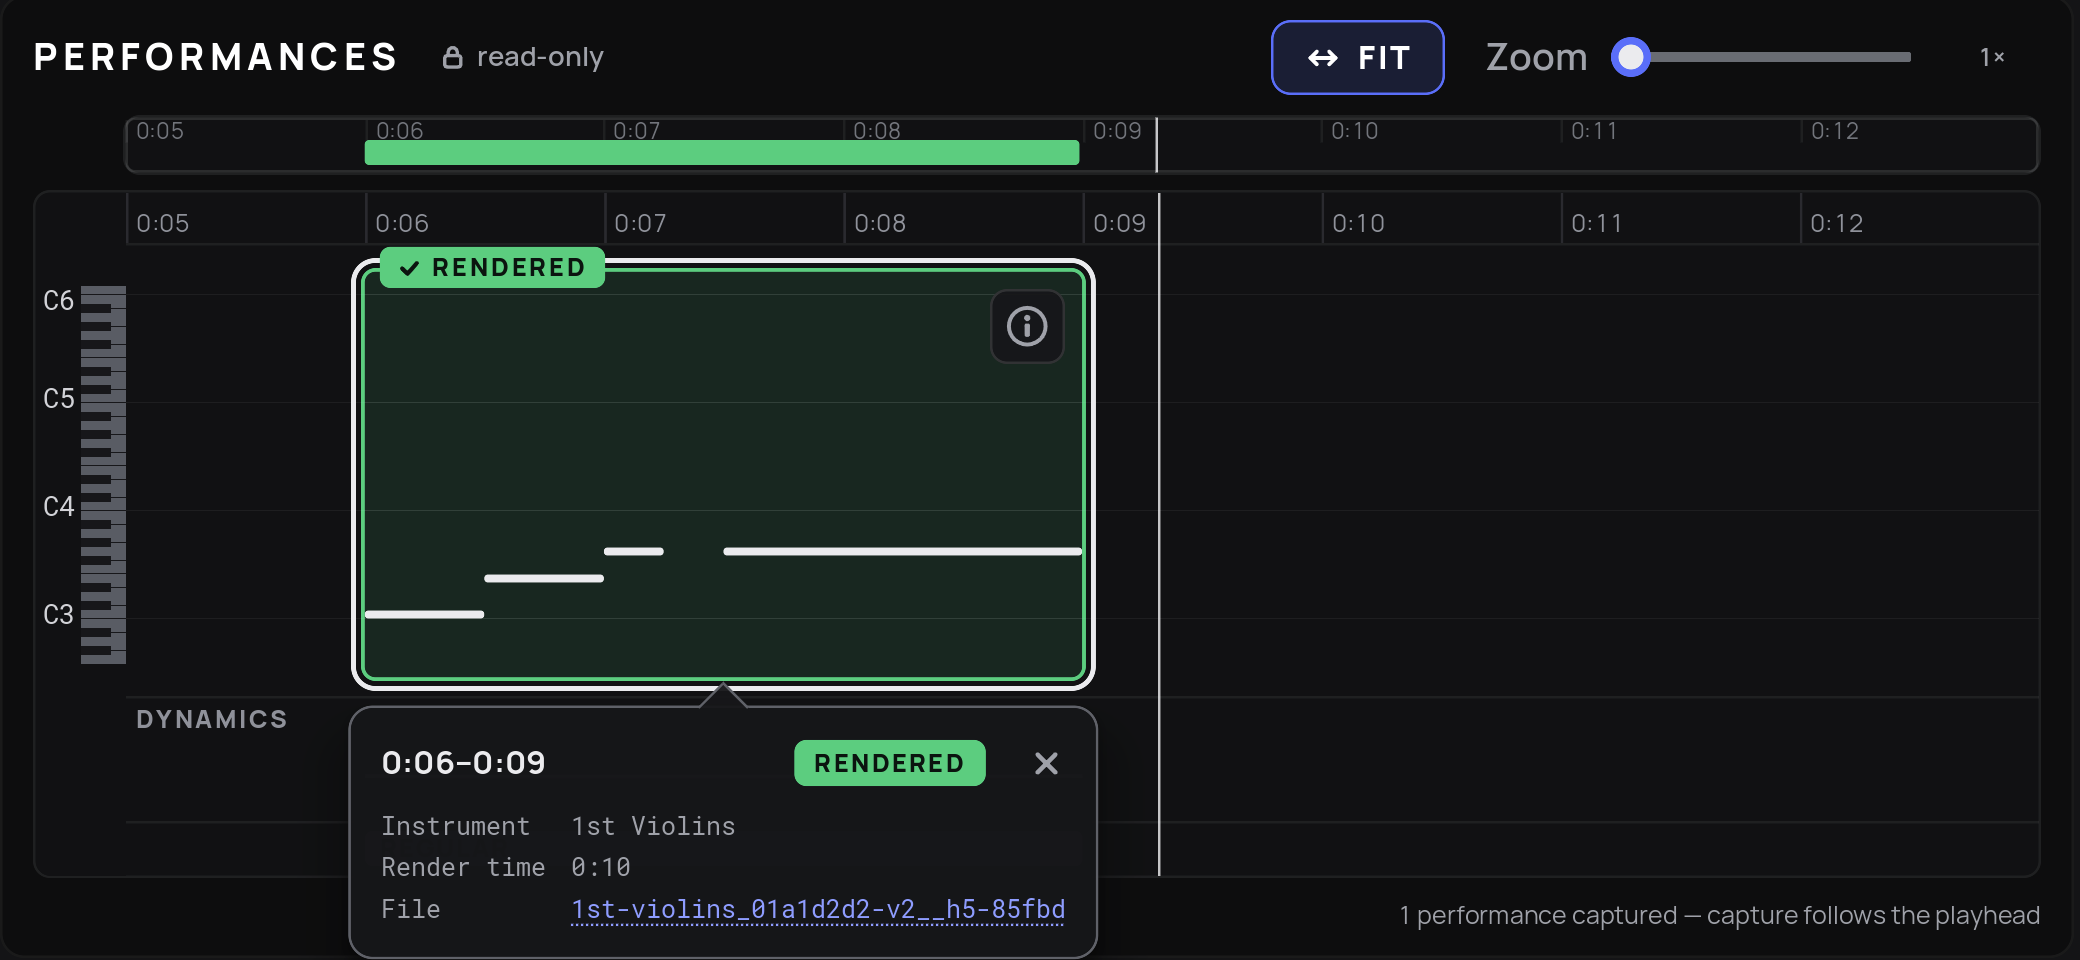
Close the details with the X button or by clicking i again.
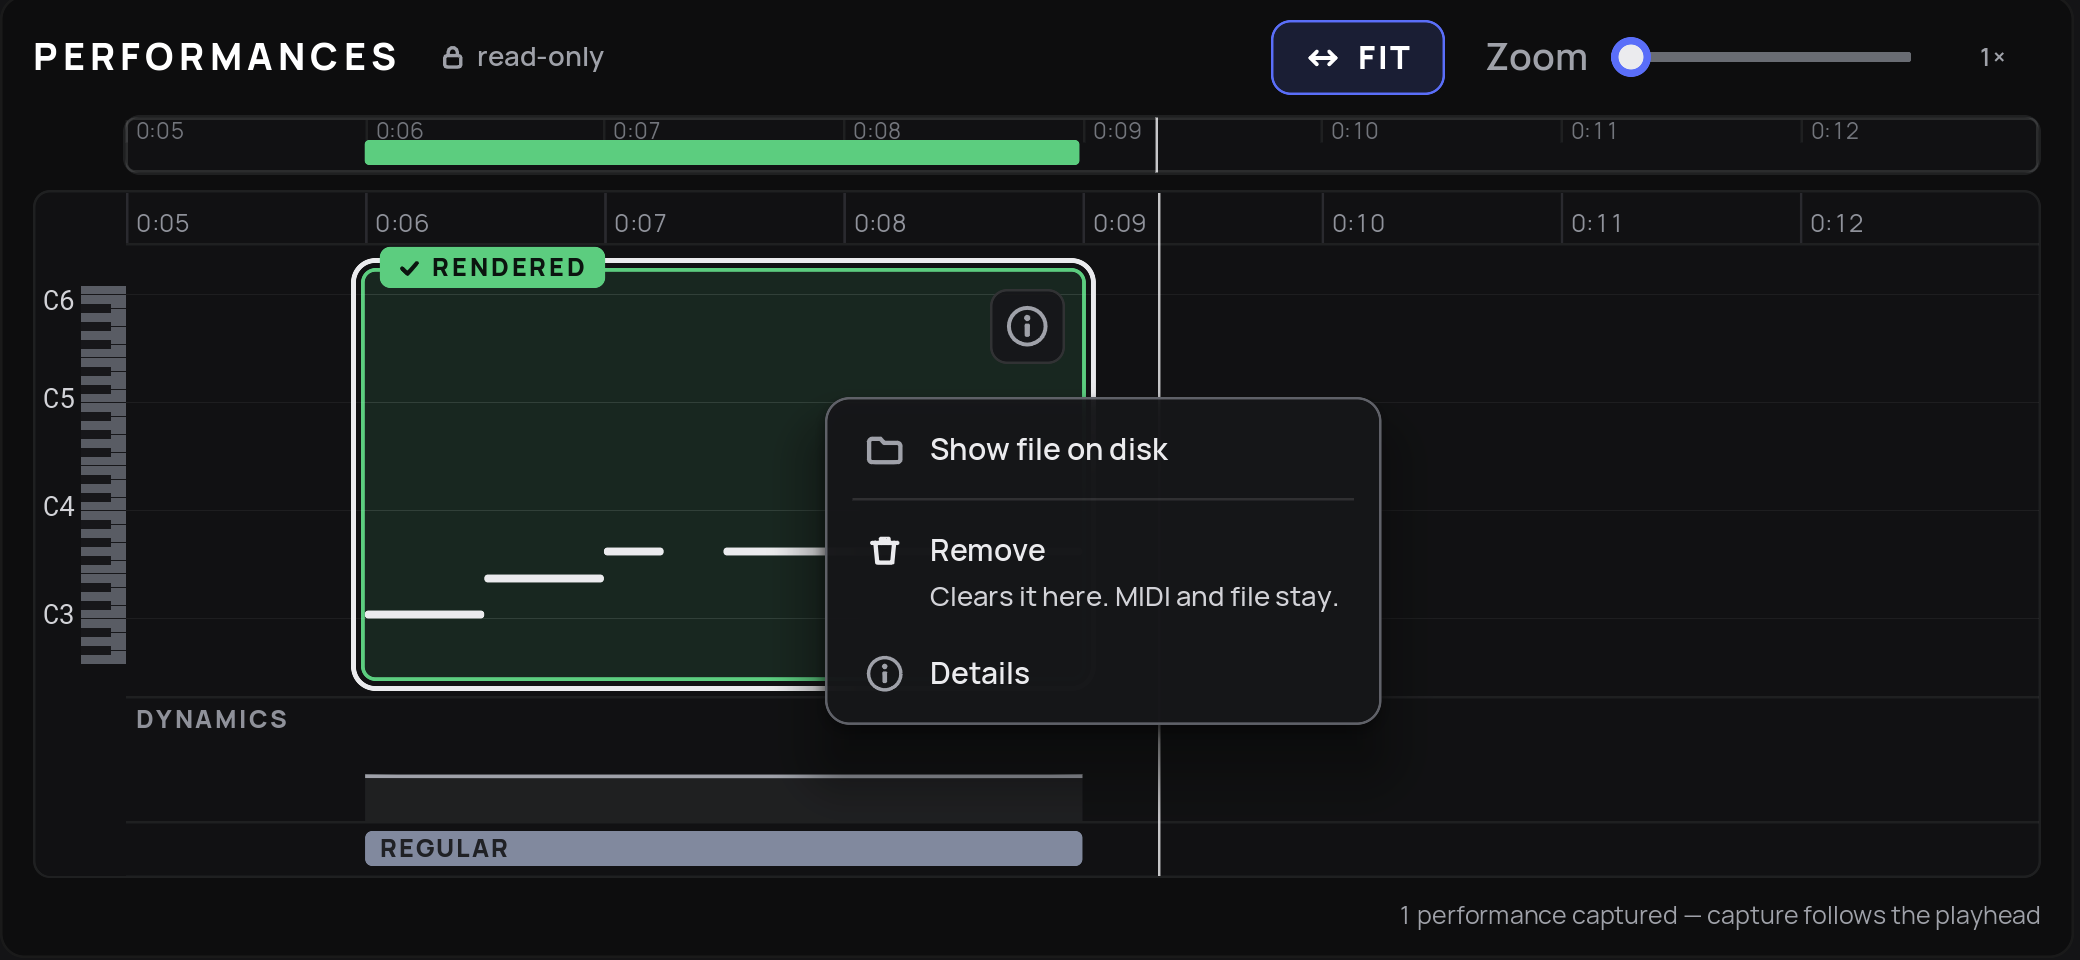
Right-click a performance for these options:
Render: renders this performance, like the Render button on the block.
Show file on disk: opens the folder that contains the rendered audio file.
Remove: clears the performance here in Vienna Performer; the MIDI in your DAW and the rendered file stay. Use this when you deleted MIDI in your DAW (Vienna Performer keeps it until the passage is captured again), or when a change was not picked up: remove the performance and capture it again. To clear all performances of this instance at once, right-click an empty part of the Performances view.
Details: opens the performance details.