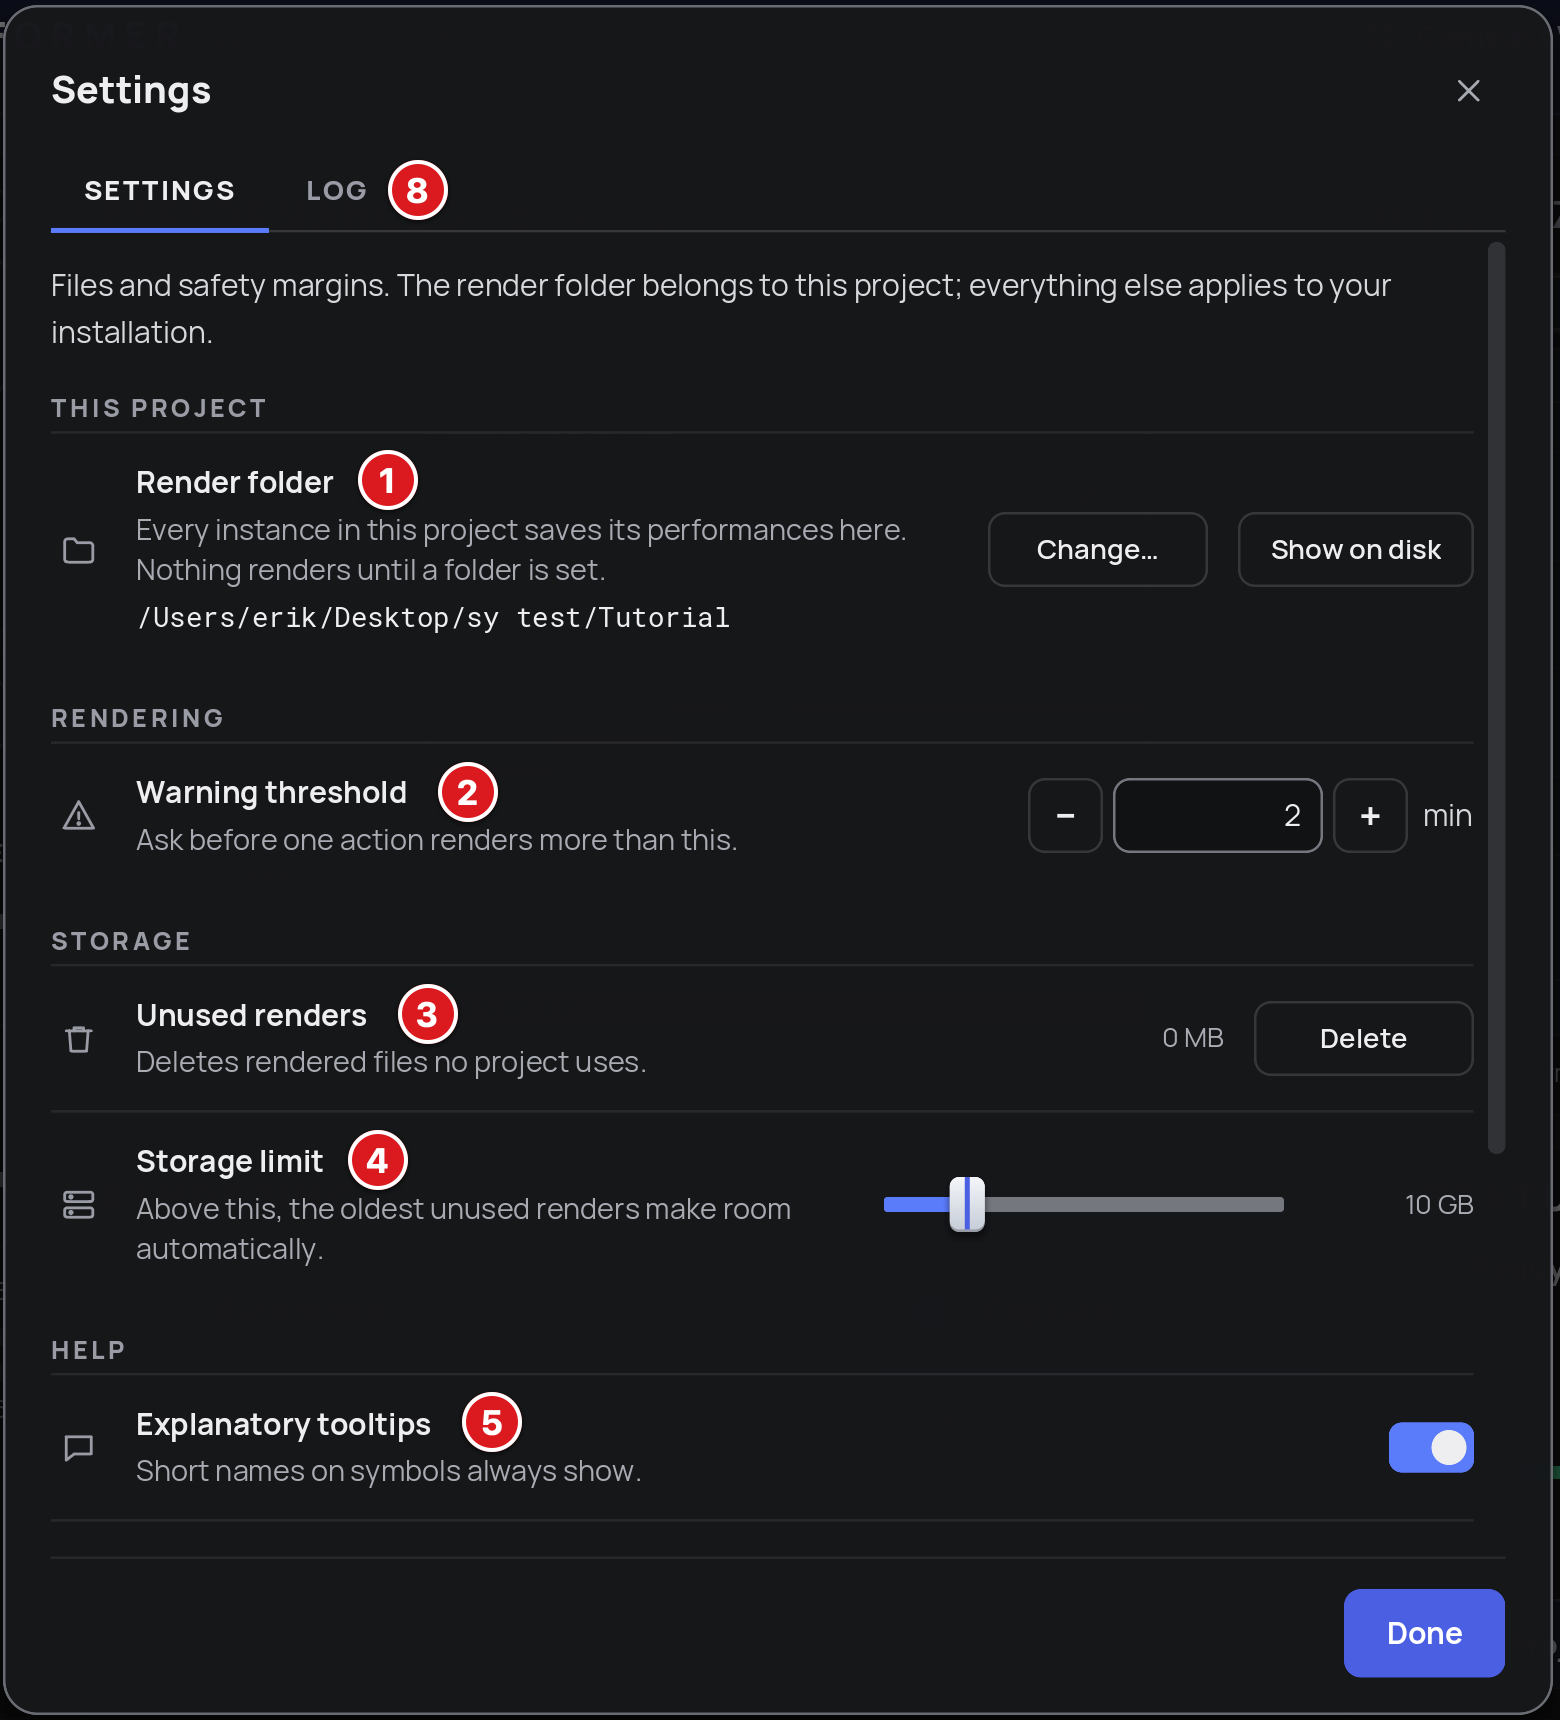
Click Settings in the header and choose Settings. The render folder belongs to the current project; all other settings apply to your whole installation. Changes apply immediately.
This project
Render folder (1): where every instance in this project saves its performances. Nothing renders until a folder is set. Change… selects another folder; Show on disk opens it.
Rendering
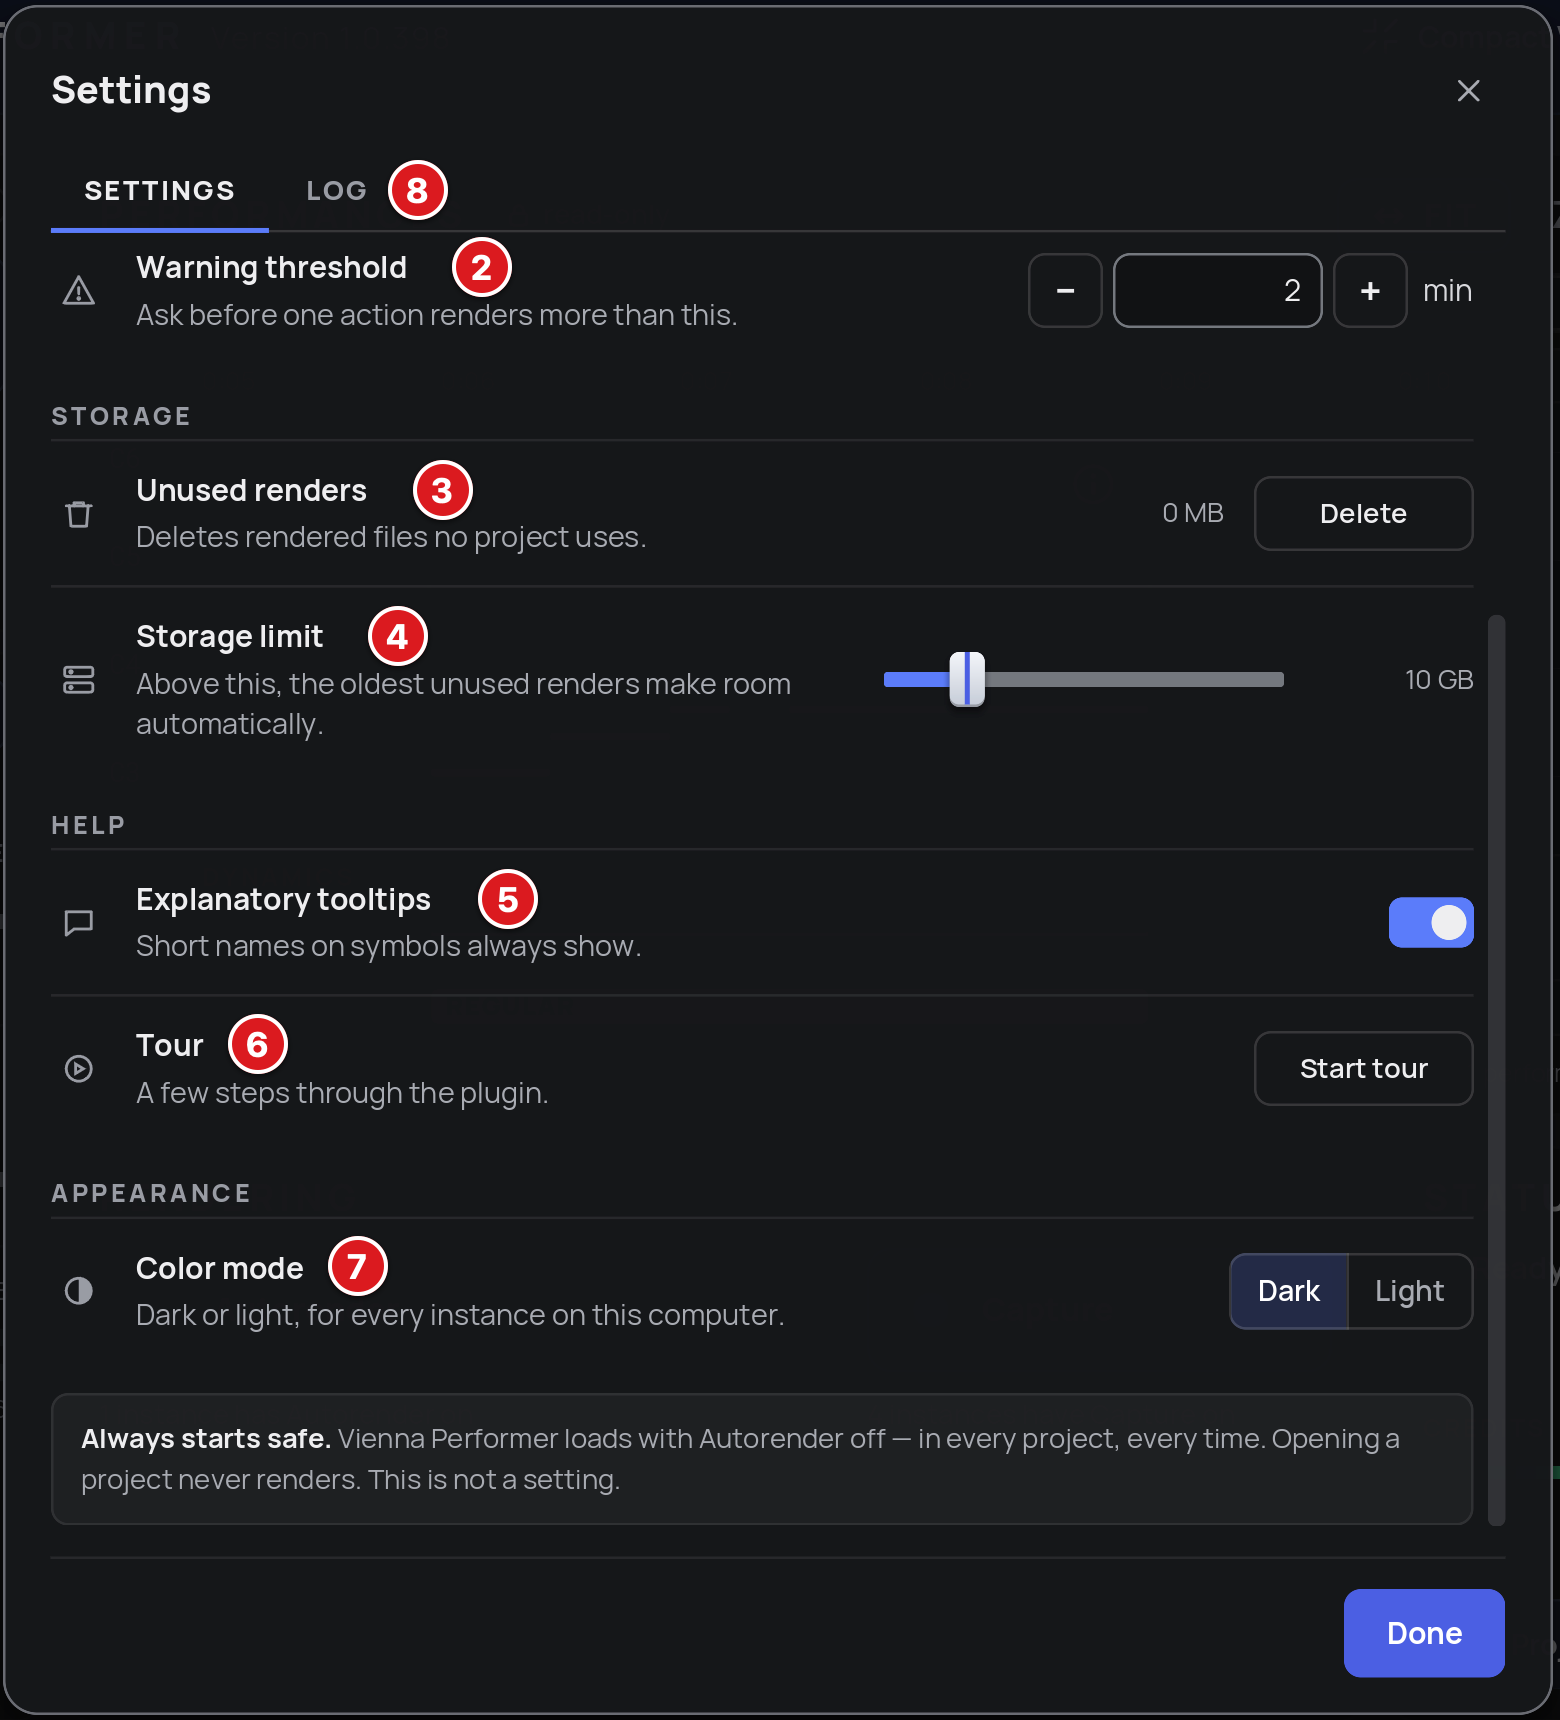
Warning threshold (2): Vienna Performer asks before one action renders more than this length (default: 2 minutes). Set it to 0 to switch the warning off.
Storage
Unused renders (3): shows how much disk space is taken by rendered files that no project uses. Delete removes them.
Storage limit (4): when unused renders exceed this size (for example 10 GB), the oldest unused renders are deleted automatically. Renders that are in use are never deleted. Drag the slider all the way to the right for no limit.
Help
Explanatory tooltips (5): shows a short explanation when you hover over an area. Short names on symbols are always shown.
Tour (6): Start tour runs the introduction tour again.
Appearance
Color mode (7): Dark or Light, for every instance on this computer.
The Log tab (8) shows the log of Vienna Performer. You can also open it with Log… in the Settings menu.
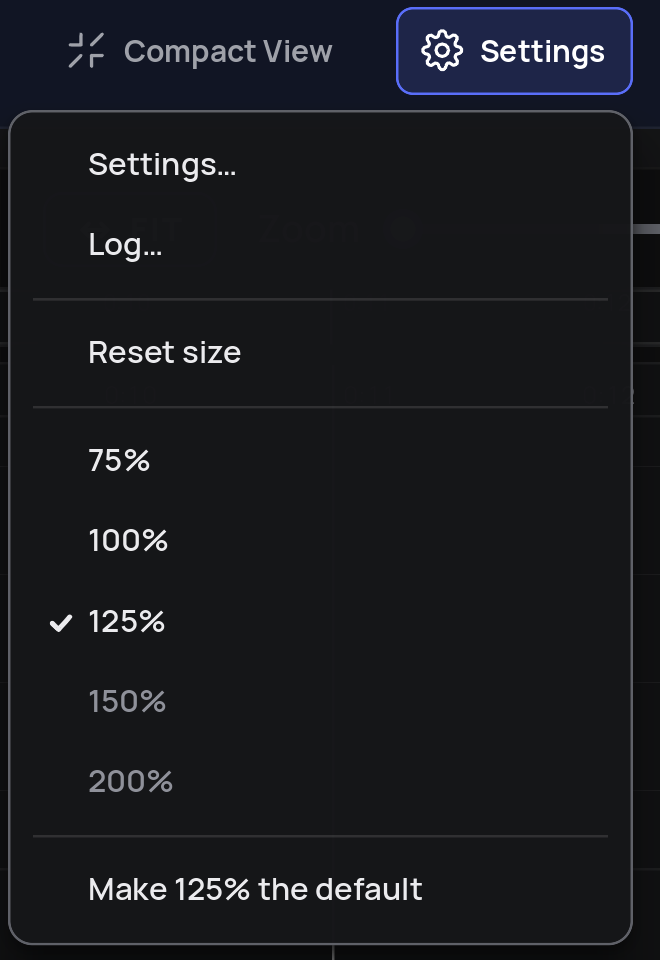
Click Settings in the header and choose a size for the plug-in window: 75%, 100%, 125%, 150% or 200%. Make … the default (for example Make 125% the default) uses the current size for new instances; Reset size returns to the default size.
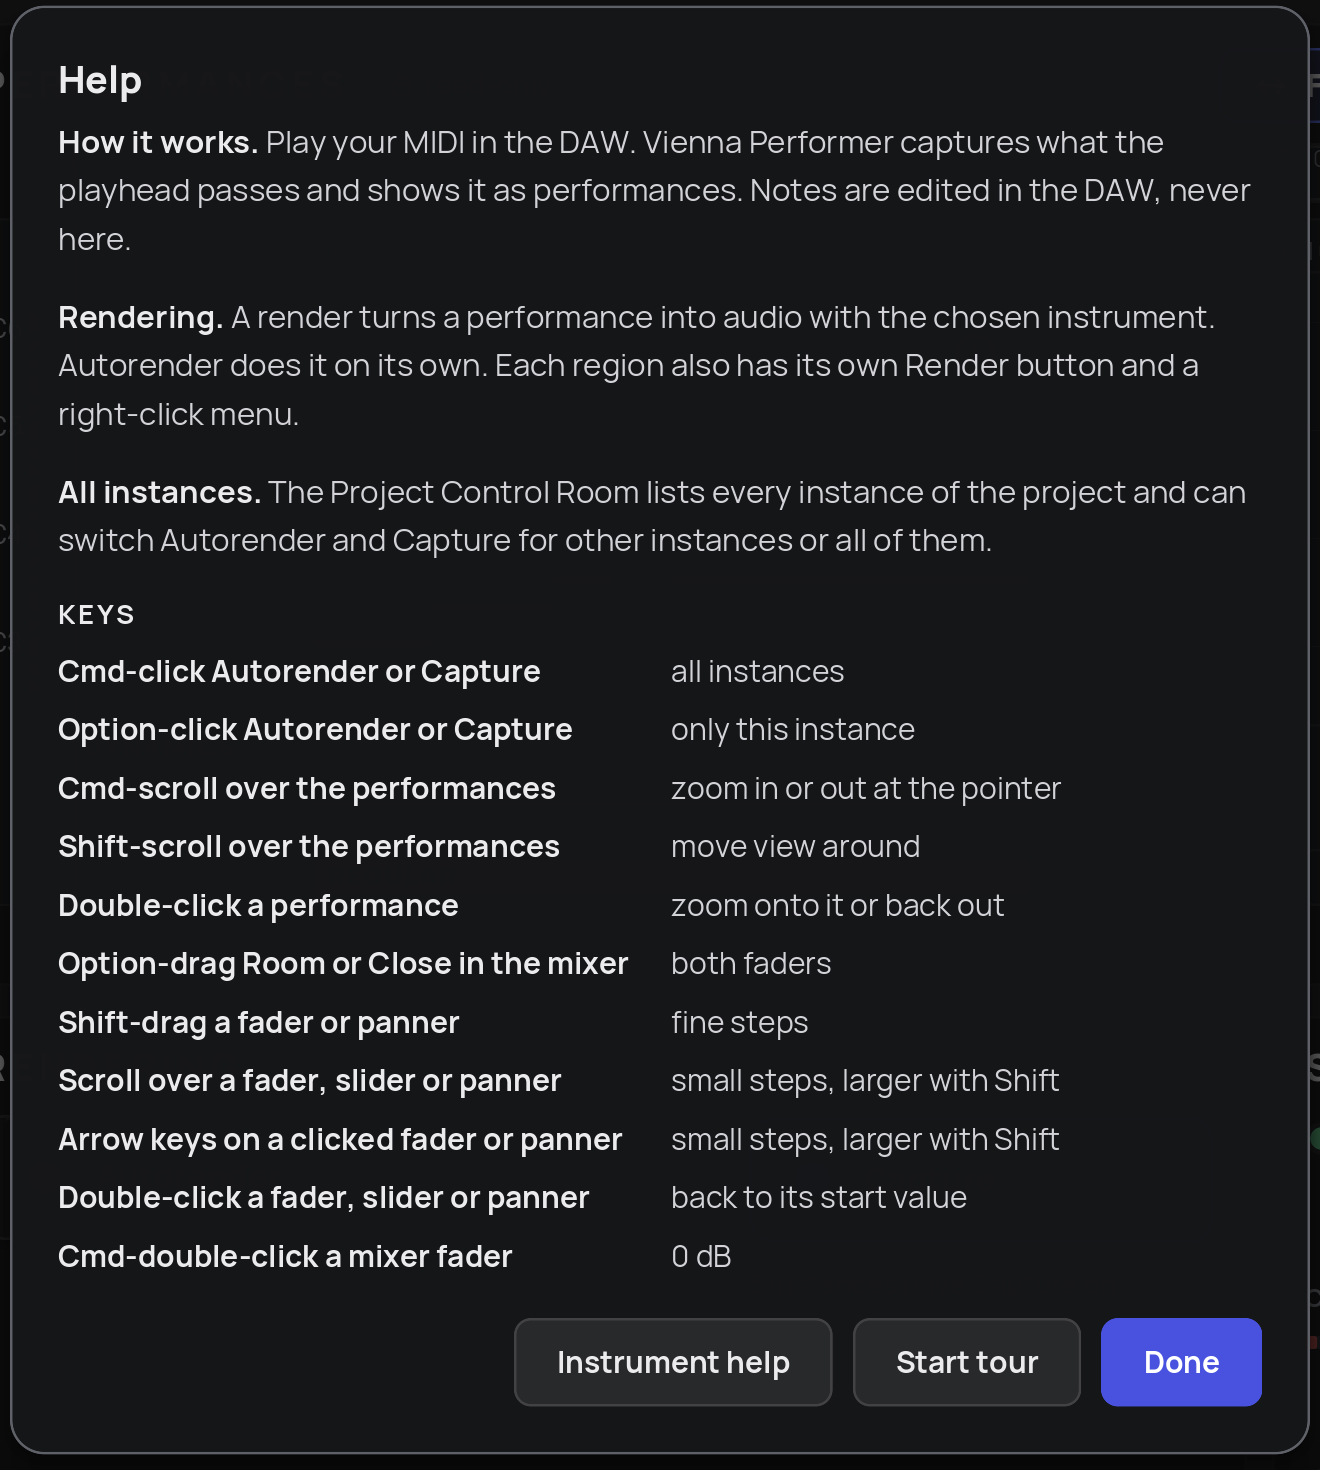
Click Help in the header to see:
A short explanation of how Vienna Performer works, of rendering and of the Project Control Room.
The modifier keys for Autorender and Capture, Option-drag on the Room or Close fader in the Mixer, which moves both faders, and the other shortcuts.
The instrument info of the loaded instrument.
Start tour: runs the tour again.